 Using Trunk Club to Update My Spring/Summer Wardrobe
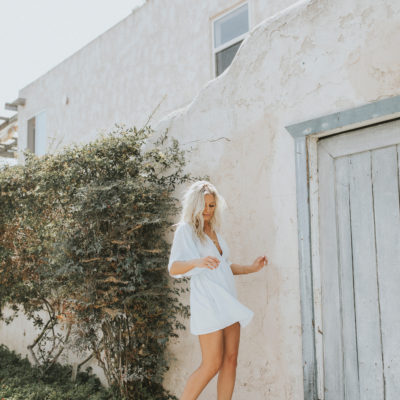 5 Tips For Styling a Simple Summer Dress
 5 Ways to Style a Bandana
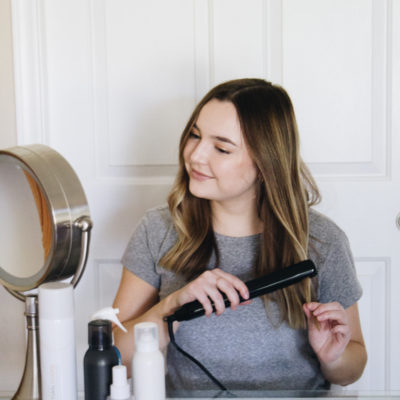 3 Different Ways to Curl Your Hair
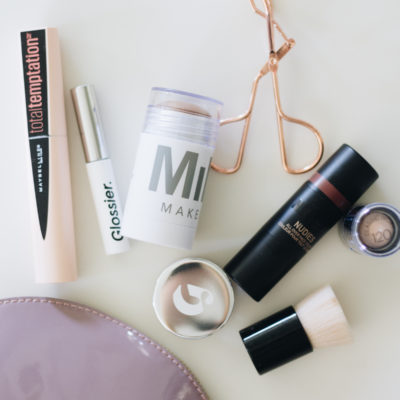 How to Master the 5-Minute Makeup Routine
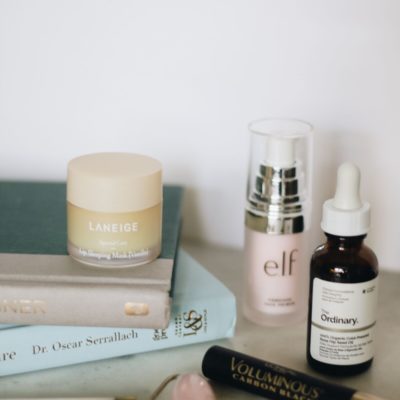 Amazon Beauty Buys Under $25
 3 Ways to Make Your next Trip More Memorable
 Tips for Digital Spring Cleaning and Organizing
 Color Trend: Marigold
 Mental Health Update: The 3 Major Changes I Made to Get Out of Depression
 5 Unexpected Ways to Unwind After Work
 How to Know You’re in a Controlling Relationship
 4 Questions I get Asked as a Professional Resume Writer
 How to Make Friends at Work
 Getting Out of the ‘Busy’ Mindset
 Ask Amanda: How do I pursue the career I want without formal training?
 Ask Amanda: How Do I Find a Therapist?
 Ask Amanda: How do I stop being jealous in my relationship?

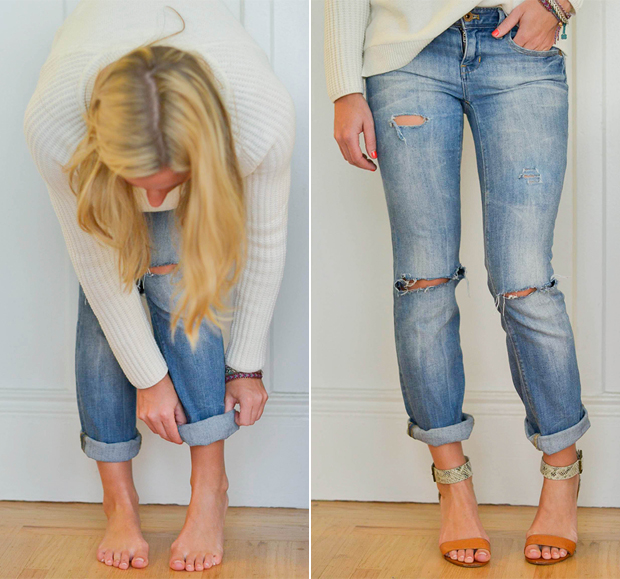
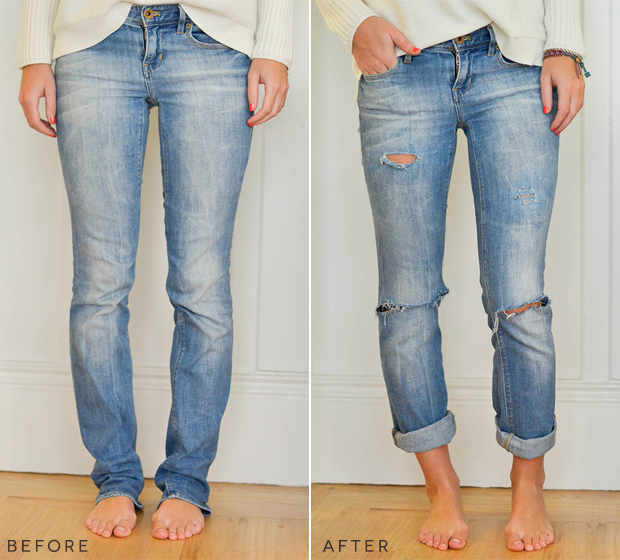
Finding the perfect pair of boyfriend jeans is not an easy task, and I’m never one to spend a ton on ripped denim that I could easily destroy myself. When it comes to boyfriend jeans, I still like them slim. So many come just a tad too baggy and aren’t the best for showing off your shape. I’ve had a pair of bootcut jeans in my drawer for some time now and I realized they are the perfect starter for creating your own boyfriend jeans. They are still fitted around the butt and thighs but loosen up just enough around the knee and calves – perfect for a slim pair of boyfriend jeans that still show off the goods. So grab that old pair of loose jeans hidden in your closet and give them a sweet little makeover with this easy tutorial:
Step 1:
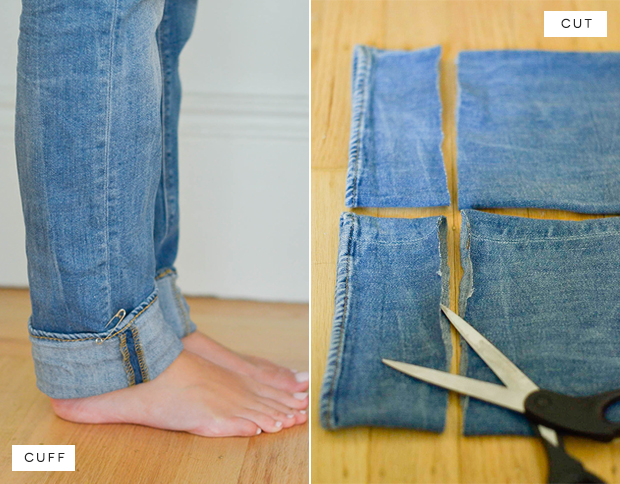
First you’ll need to cut the hem. This is to ensure that when you roll the jeans, they don’t get too bulky. Cuff them just above our ankle and use a safety pin to hold the cuff in place. Then take the jeans off (don’t try to cut them while they’re still on you lazy bums!), and cut both hems at the bottom of the cuff.
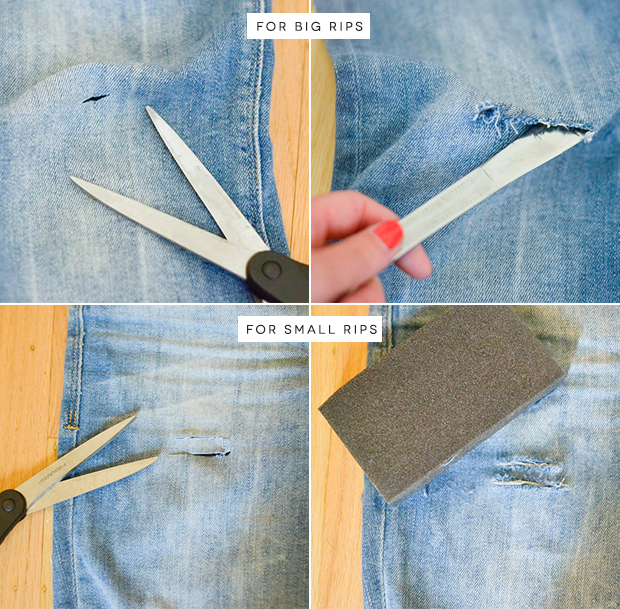
Step 2:
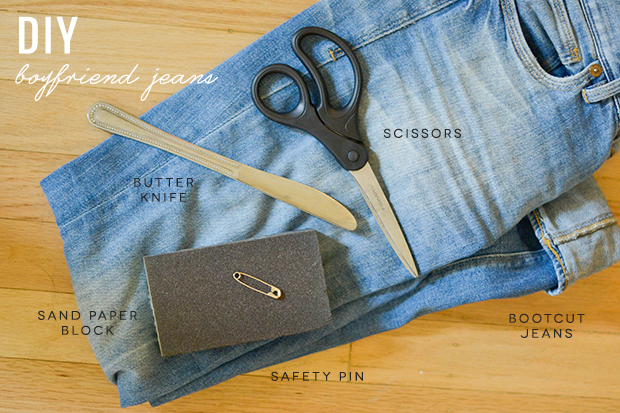
Now it’s time to distress your denim. For big rips around the knees, start with a small snip using your scissors. Use your butter knife to widen the hole. This knife is perfect for creating those frayed edges. You can also rip the hole yourself as it gets bigger. For smaller distressed details, use the scissors to create a couple small slits. Then take a sand paper block and rough up the holes.
Step 3:
Roll your denim 2-3 times for the perfect boyfriend jeans. And you’re done!


Style Bits and Bobs of ME Says
Great, easy and simple tutorial!
Julie L. Says
This is perfect! I hate the slouchiness of most boyfriend jeans, and as a girl who is wider through the hips/thighs, bf jeans tend to cling to me there, but still have the low crouch, aka not a good look! I’ve been on the search for the perfect pair of distressed jeans, but I have an old pair in my closet that would be perfect for this. Thanks for the inspiration!
eleanor Says
loove these! they turned out so well! :)
xxx
http://eleanorcos.blogspot.com/
Piniel S Says
Great DIY post especially since boyfriend jeans are so on trend!
Miroslava Says
Great tutorial! Good way to revive all those “old” jeans in the back of the closet
paige Says
Loving this tutorial! I have an old pair that I definitely want to try this on!
Paige
http://thehappyflammily.com
Shannon Says
Loving this tutorial! I have a handful of jeans that I would love to try this on!
Shannon
http://GBBOfashion.com
Pingback: 6 Things We Love ... - One Girl's Dish
Julianne Says
Not too loose, not too ripped… just perfection!
XO, J
thewinkblog.net
Pingback: Monday Links to Love | buttons & blossoms
Pingback: 5 Reasons to Wear Statement Necklaces
Pingback: DIY Chic Boyfriend Jean At Home | DIY Home Things
Pingback: White Boyfriend Jeans
Pingback: Boyfriends & Jeans | LIGHT & VIBES
Pingback: Boyfriends & Jeans | Light and Vibes
Pingback: 10 Genius DIY Ways To Transform Your Old Jeans Into New Trendy Fashion Piece | World inside pictures
Pingback: 10 Genius DIY Ways To Transform Your Old Jeans Into New Trendy Fashion Piece | eKanpSack
Pingback: 10 Genius DIY Ways To Transform Your Old Jeans Into New Trendy Fashion Piece | HeySup
Pingback: 15 Easy DIY Hacks To Transform Your Old Jeans Into Trendy Fashion Piece | ALL FOR FASHION DESIGN
Pingback: 14 Impressive Jeans Renew Hacks That Will Keep You Always In Trend | ALL FOR FASHION DESIGN
Tara Says
i get an amazing frayed distressed pair of jeans using a cheese grater! The tinier kind for nutmeg works fantastic!
Pingback: 20 Creative DIY Ways To Transform Your Old Jeans For Spring - Fashion, Beauty, Sex, Entertainment News for Teens | Maiden Girls
Pingback: 25 Denim Hacks To Save Your Favorite Jeans | Hello Glow