 Using Trunk Club to Update My Spring/Summer Wardrobe
 5 Tips For Styling a Simple Summer Dress
 5 Ways to Style a Bandana
 3 Different Ways to Curl Your Hair
 How to Master the 5-Minute Makeup Routine
 Amazon Beauty Buys Under $25
 3 Ways to Make Your next Trip More Memorable
 Tips for Digital Spring Cleaning and Organizing
 Color Trend: Marigold
 Mental Health Update: The 3 Major Changes I Made to Get Out of Depression
 5 Unexpected Ways to Unwind After Work
 How to Know You’re in a Controlling Relationship
 4 Questions I get Asked as a Professional Resume Writer
 How to Make Friends at Work
 Getting Out of the ‘Busy’ Mindset
 Ask Amanda: How do I pursue the career I want without formal training?
 Ask Amanda: How Do I Find a Therapist?
 Ask Amanda: How do I stop being jealous in my relationship?

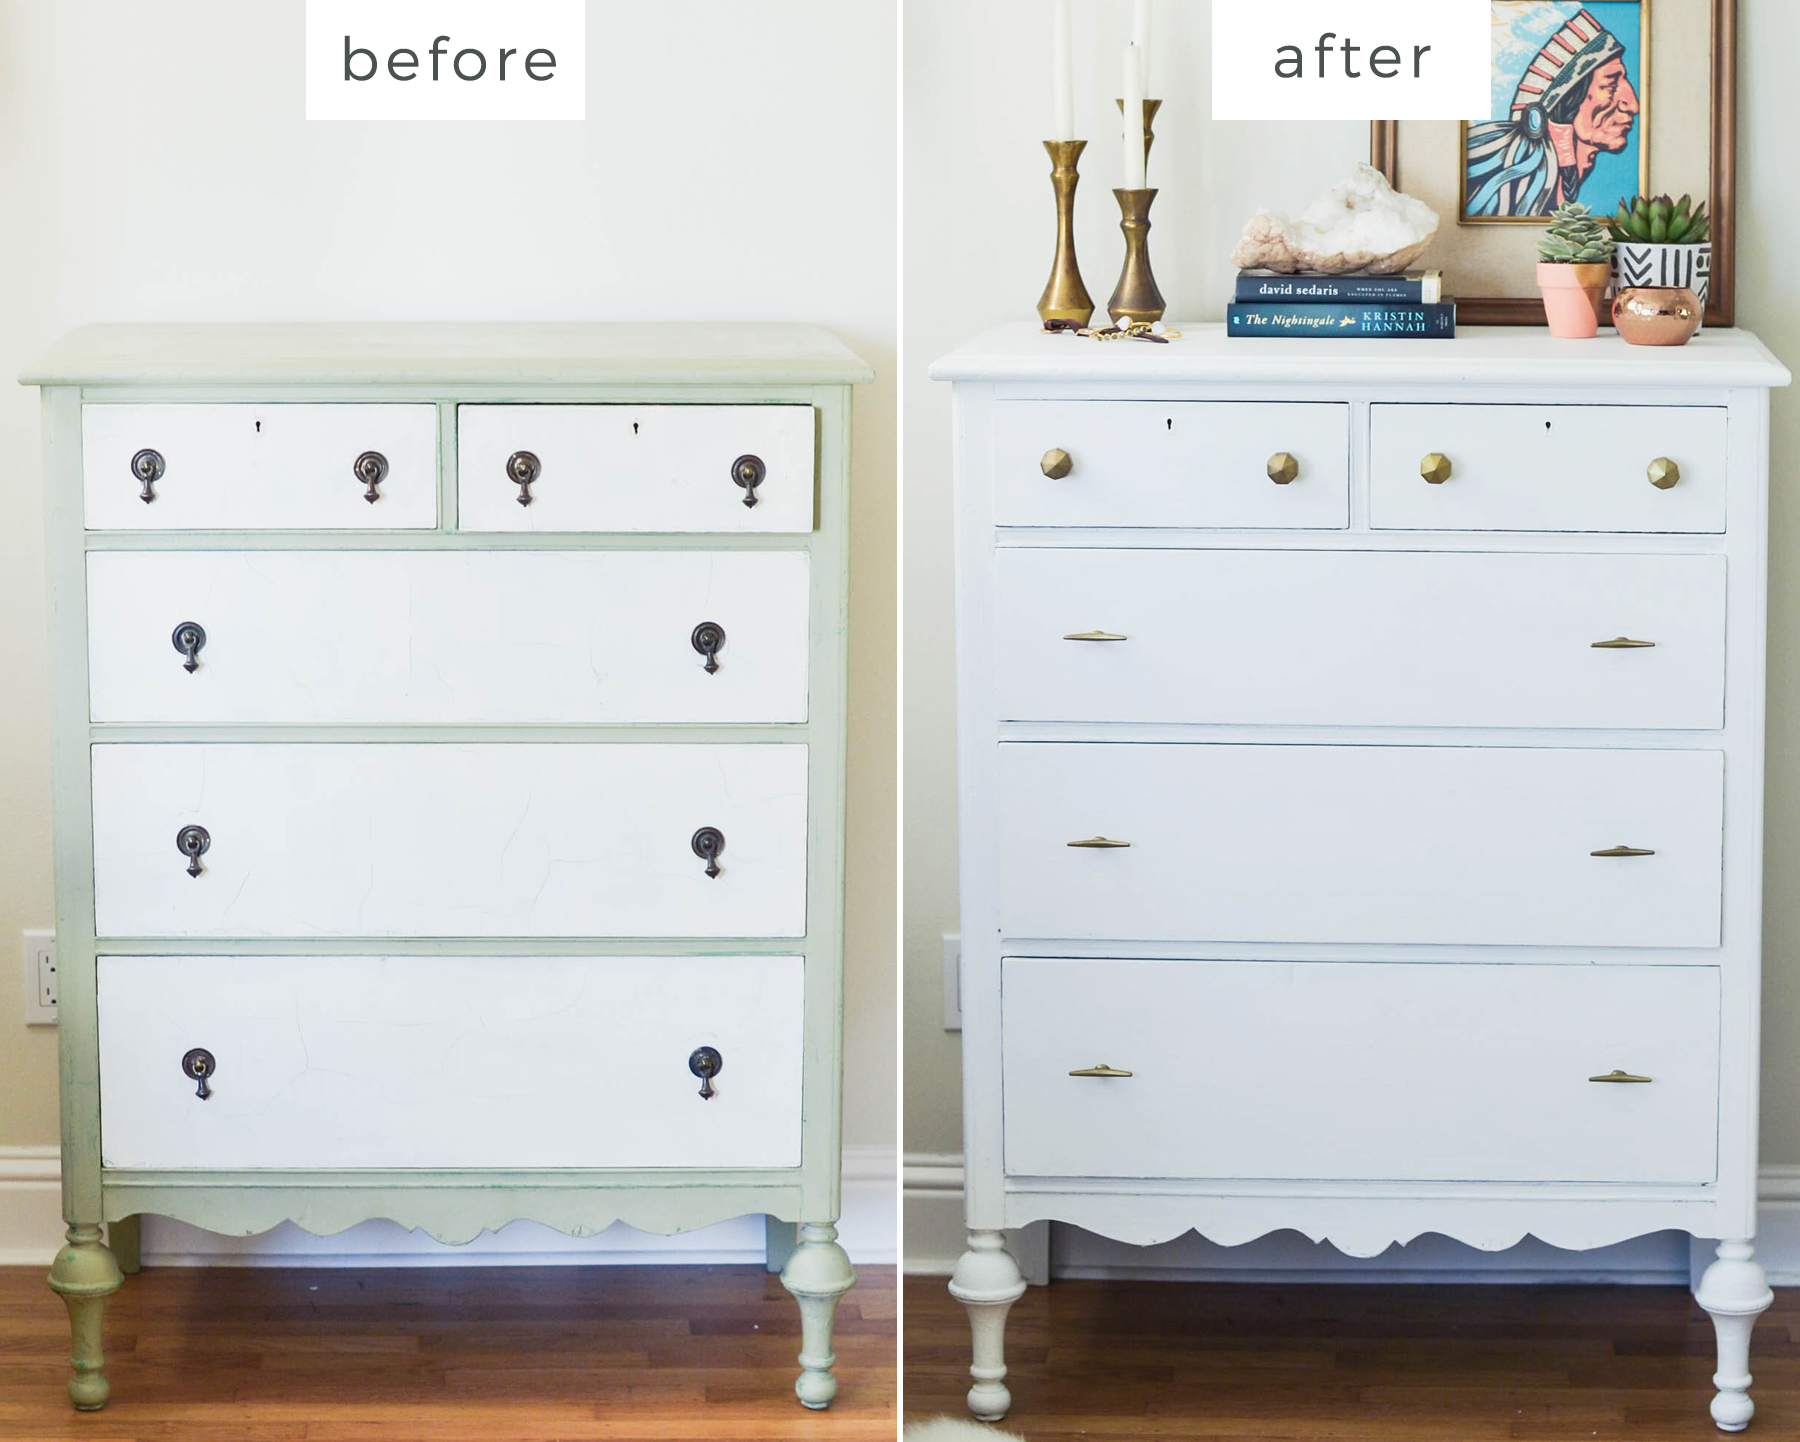
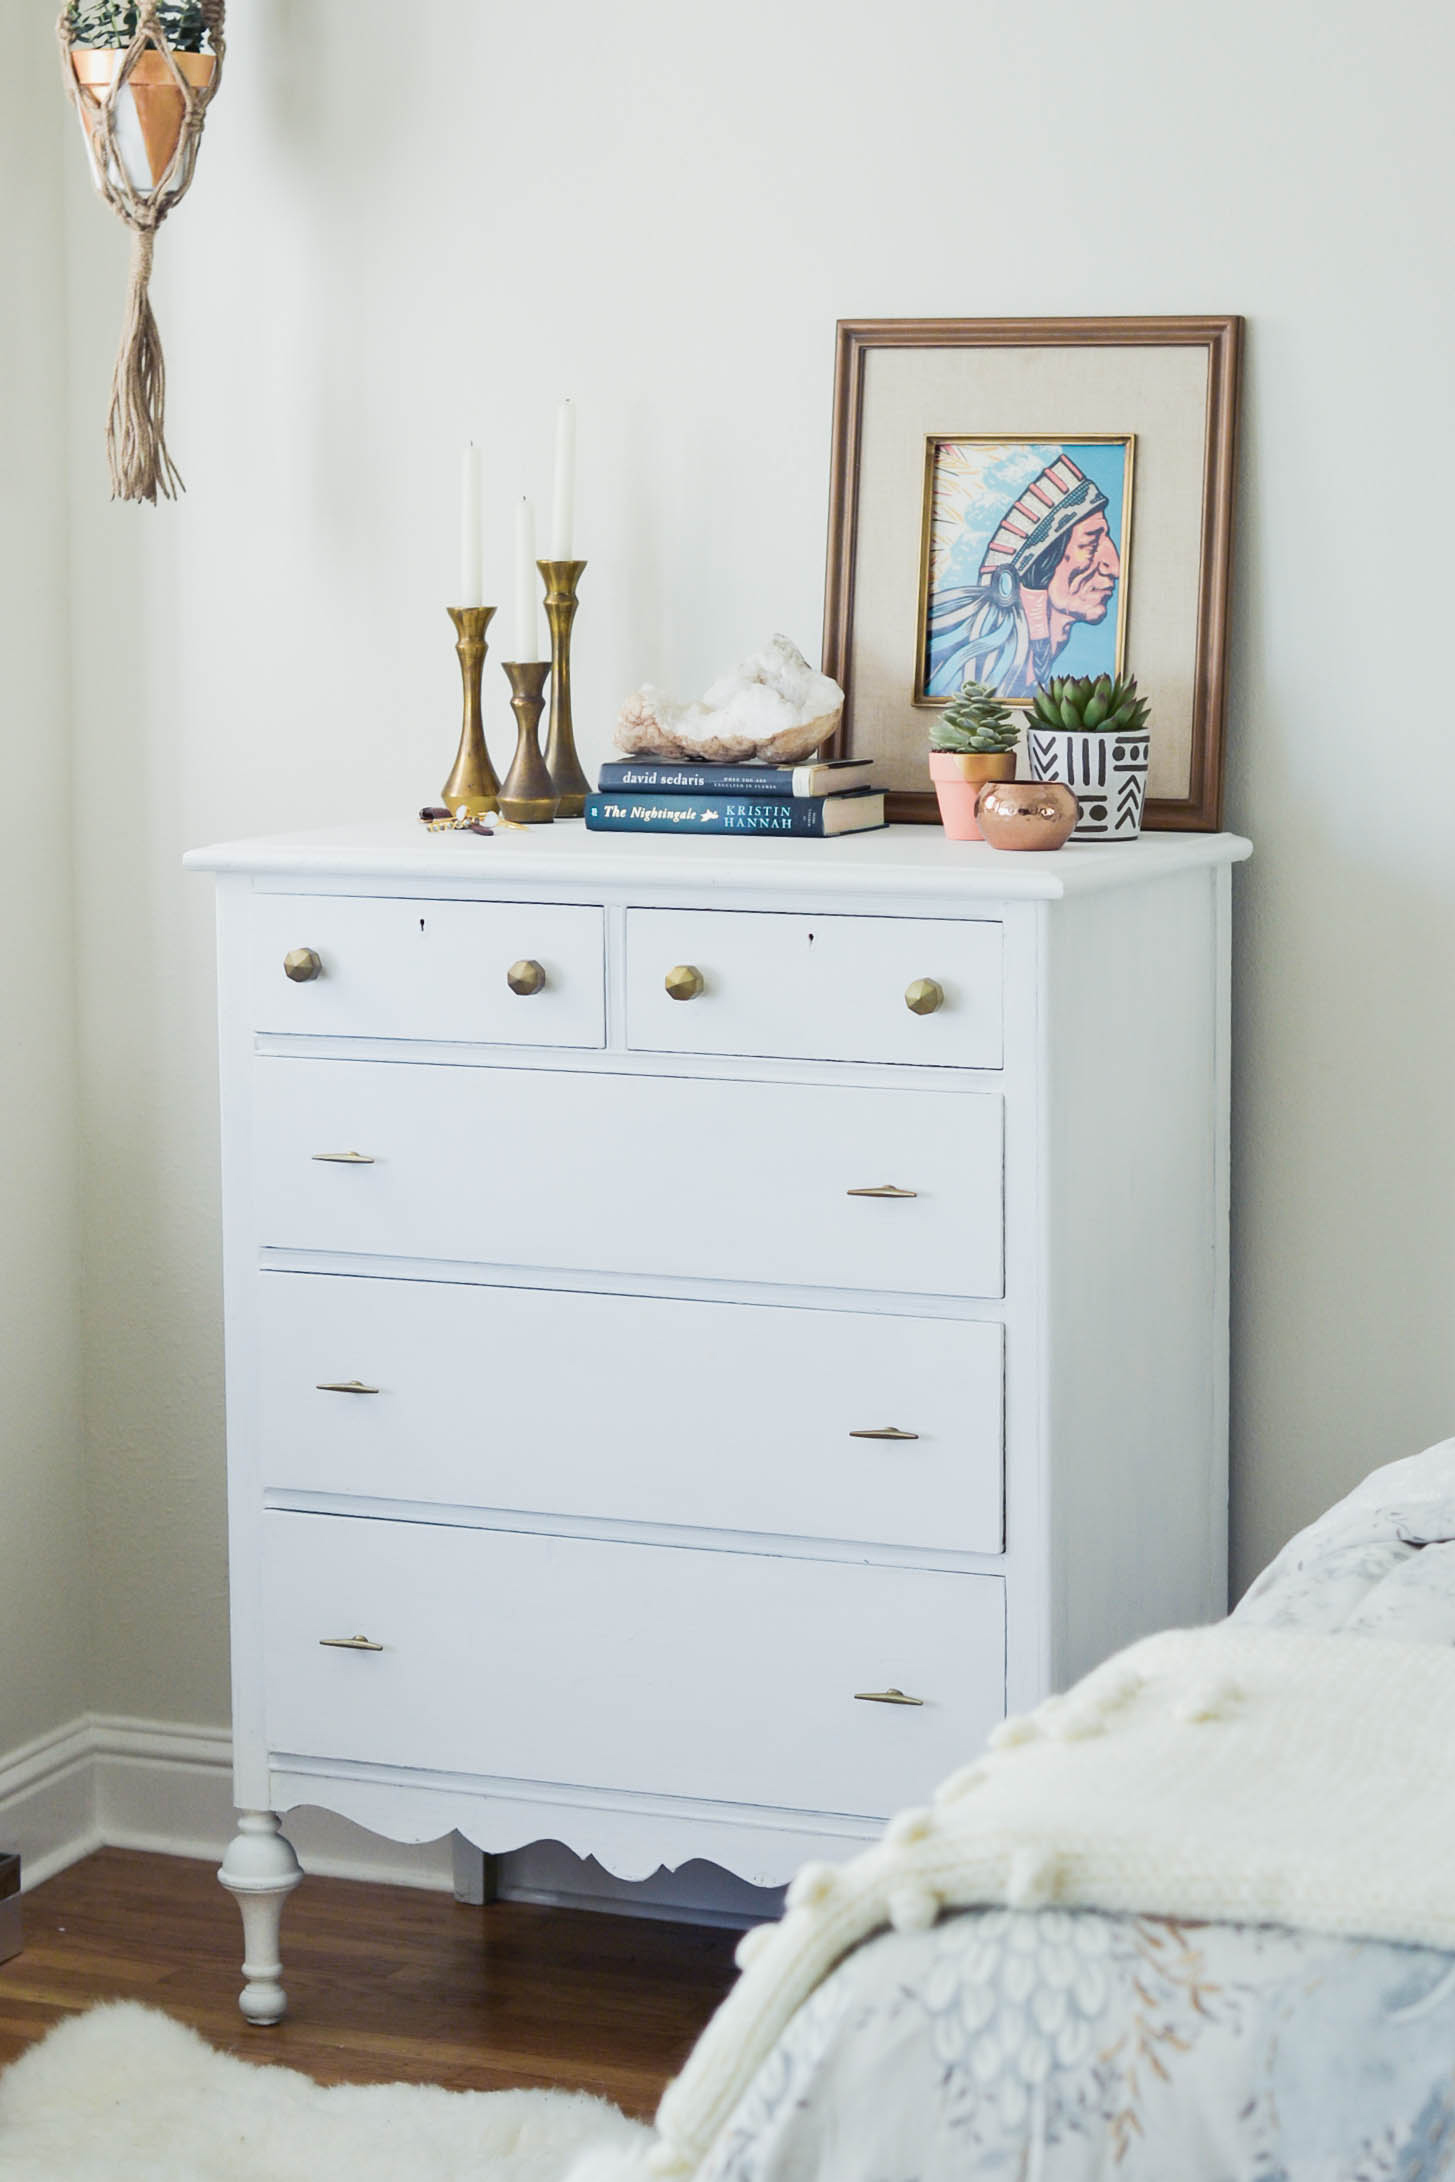
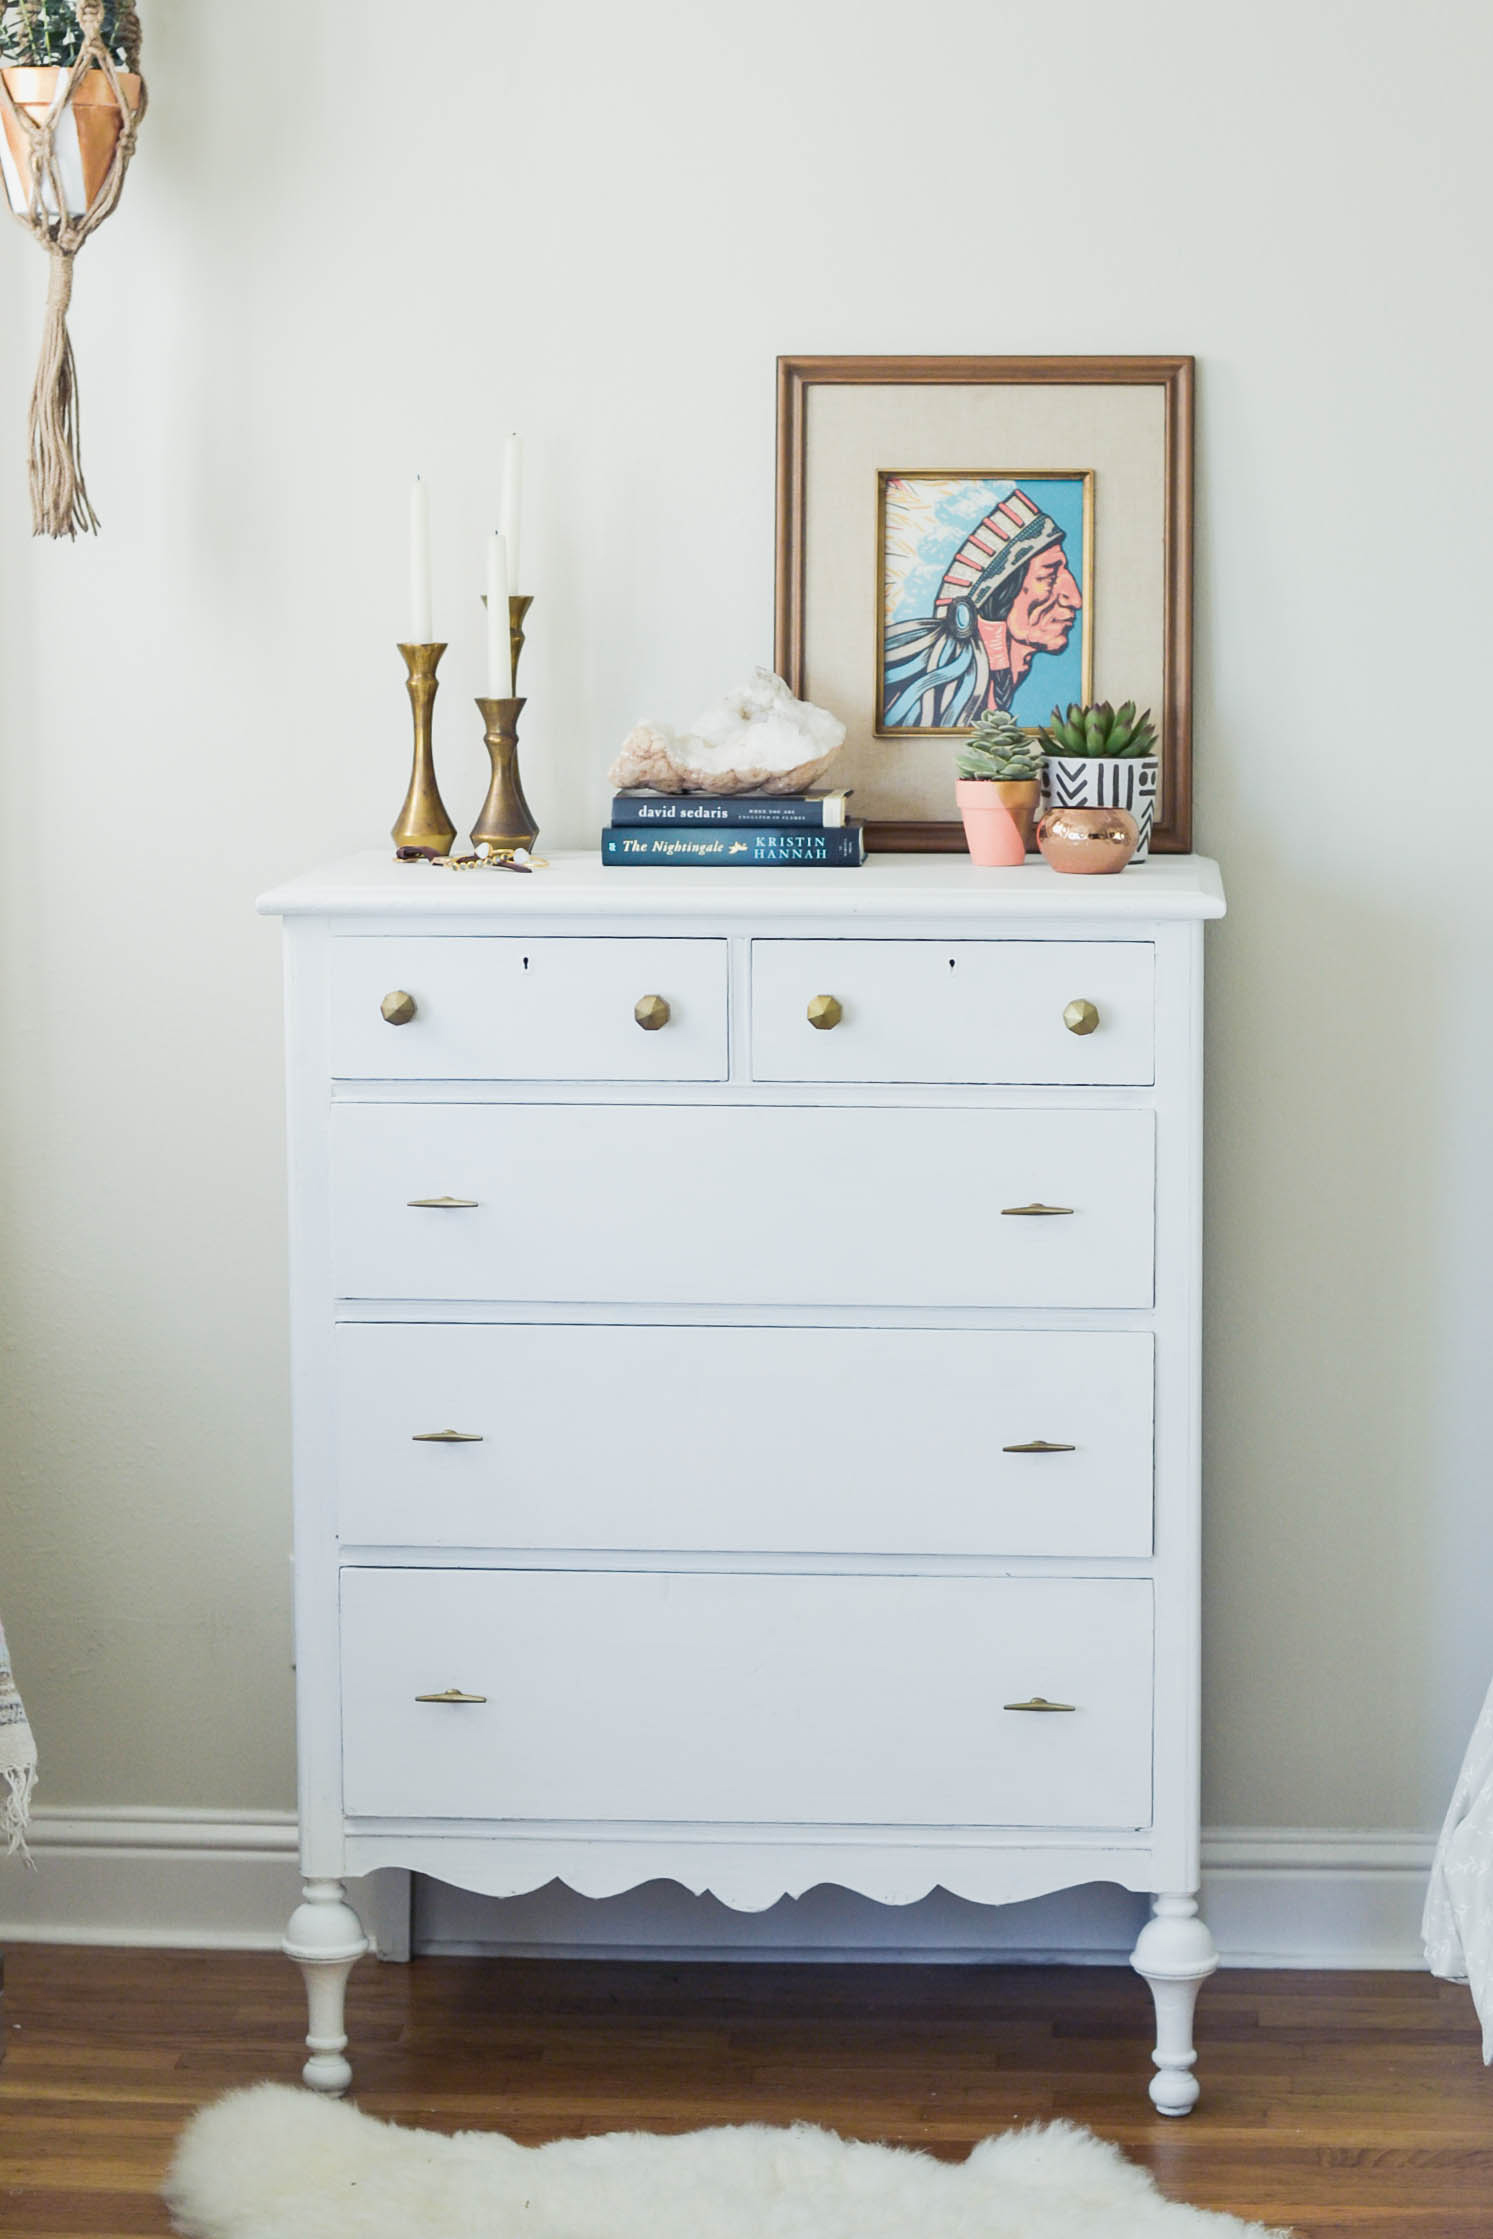
I moved to San Francisco in August and just got a dresser last week. That’s how long I’d been looking for the perfect one. I searched my go-tos: Urban Outfitters, Dot & Bo, Joss & Main, Overstock and more. I cam close, but just couldn’t find the shabby chic look in the right size and at the right price.
So I turned to Craigslist and found this green and white dresser. The shape was what I was looking for, and the price was definitely under budget. I’d never painted furniture before, but thought I’d give it a try. If that’s what it was going to take to create my perfect dresser, then I was up for the challenge. I went to the hardware store, asked a million questions, and somehow succeeded in this dresser makeover — I’m pretty proud of myself! Here’s how it’s done:
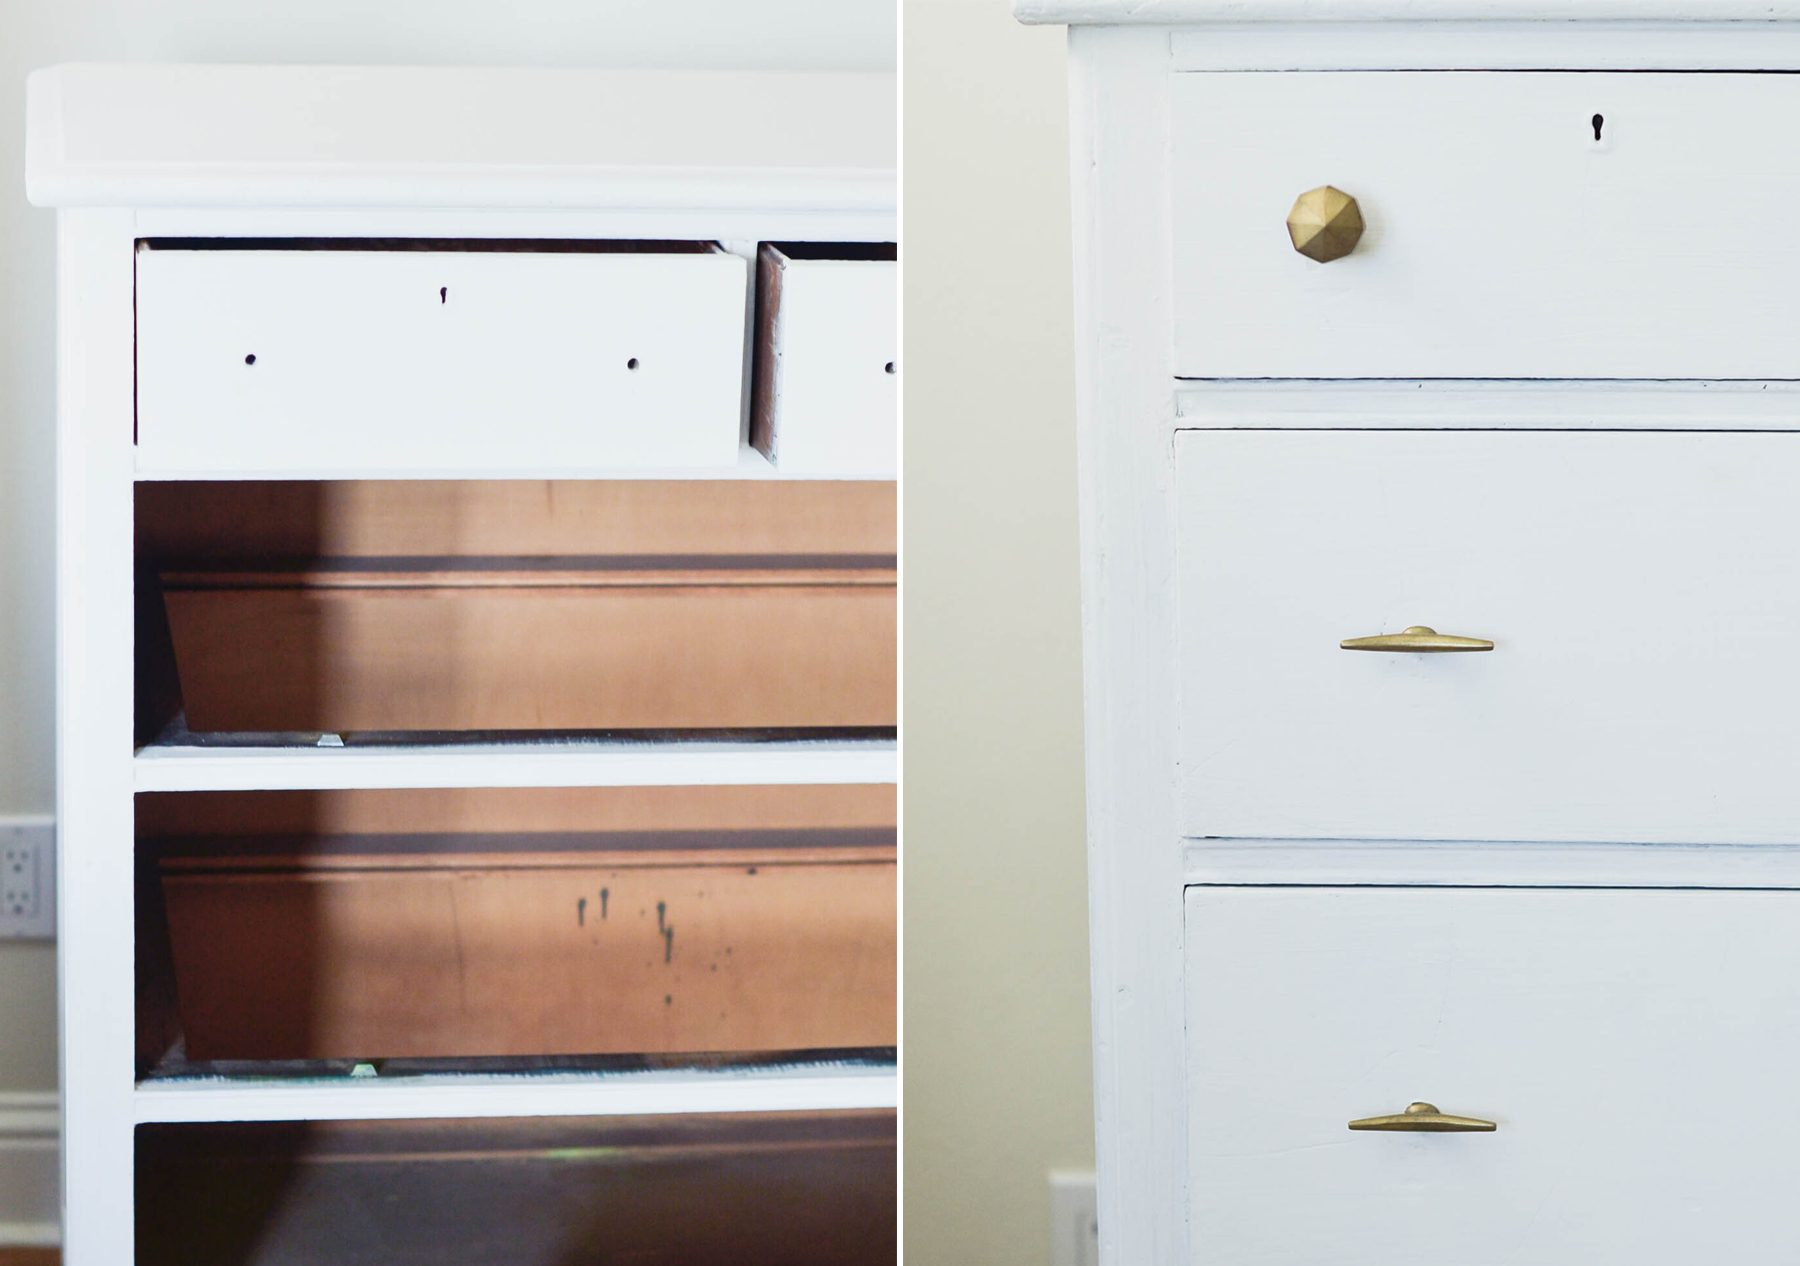
1. Remove Hardware
First, remove the drawers from the dresser and take the knobs off as well.
2. Wipe Down
Using castille soap and water, wipe down the entire dresser with a paper towel. Then wipe it again with just a wet paper towel. Let dry.
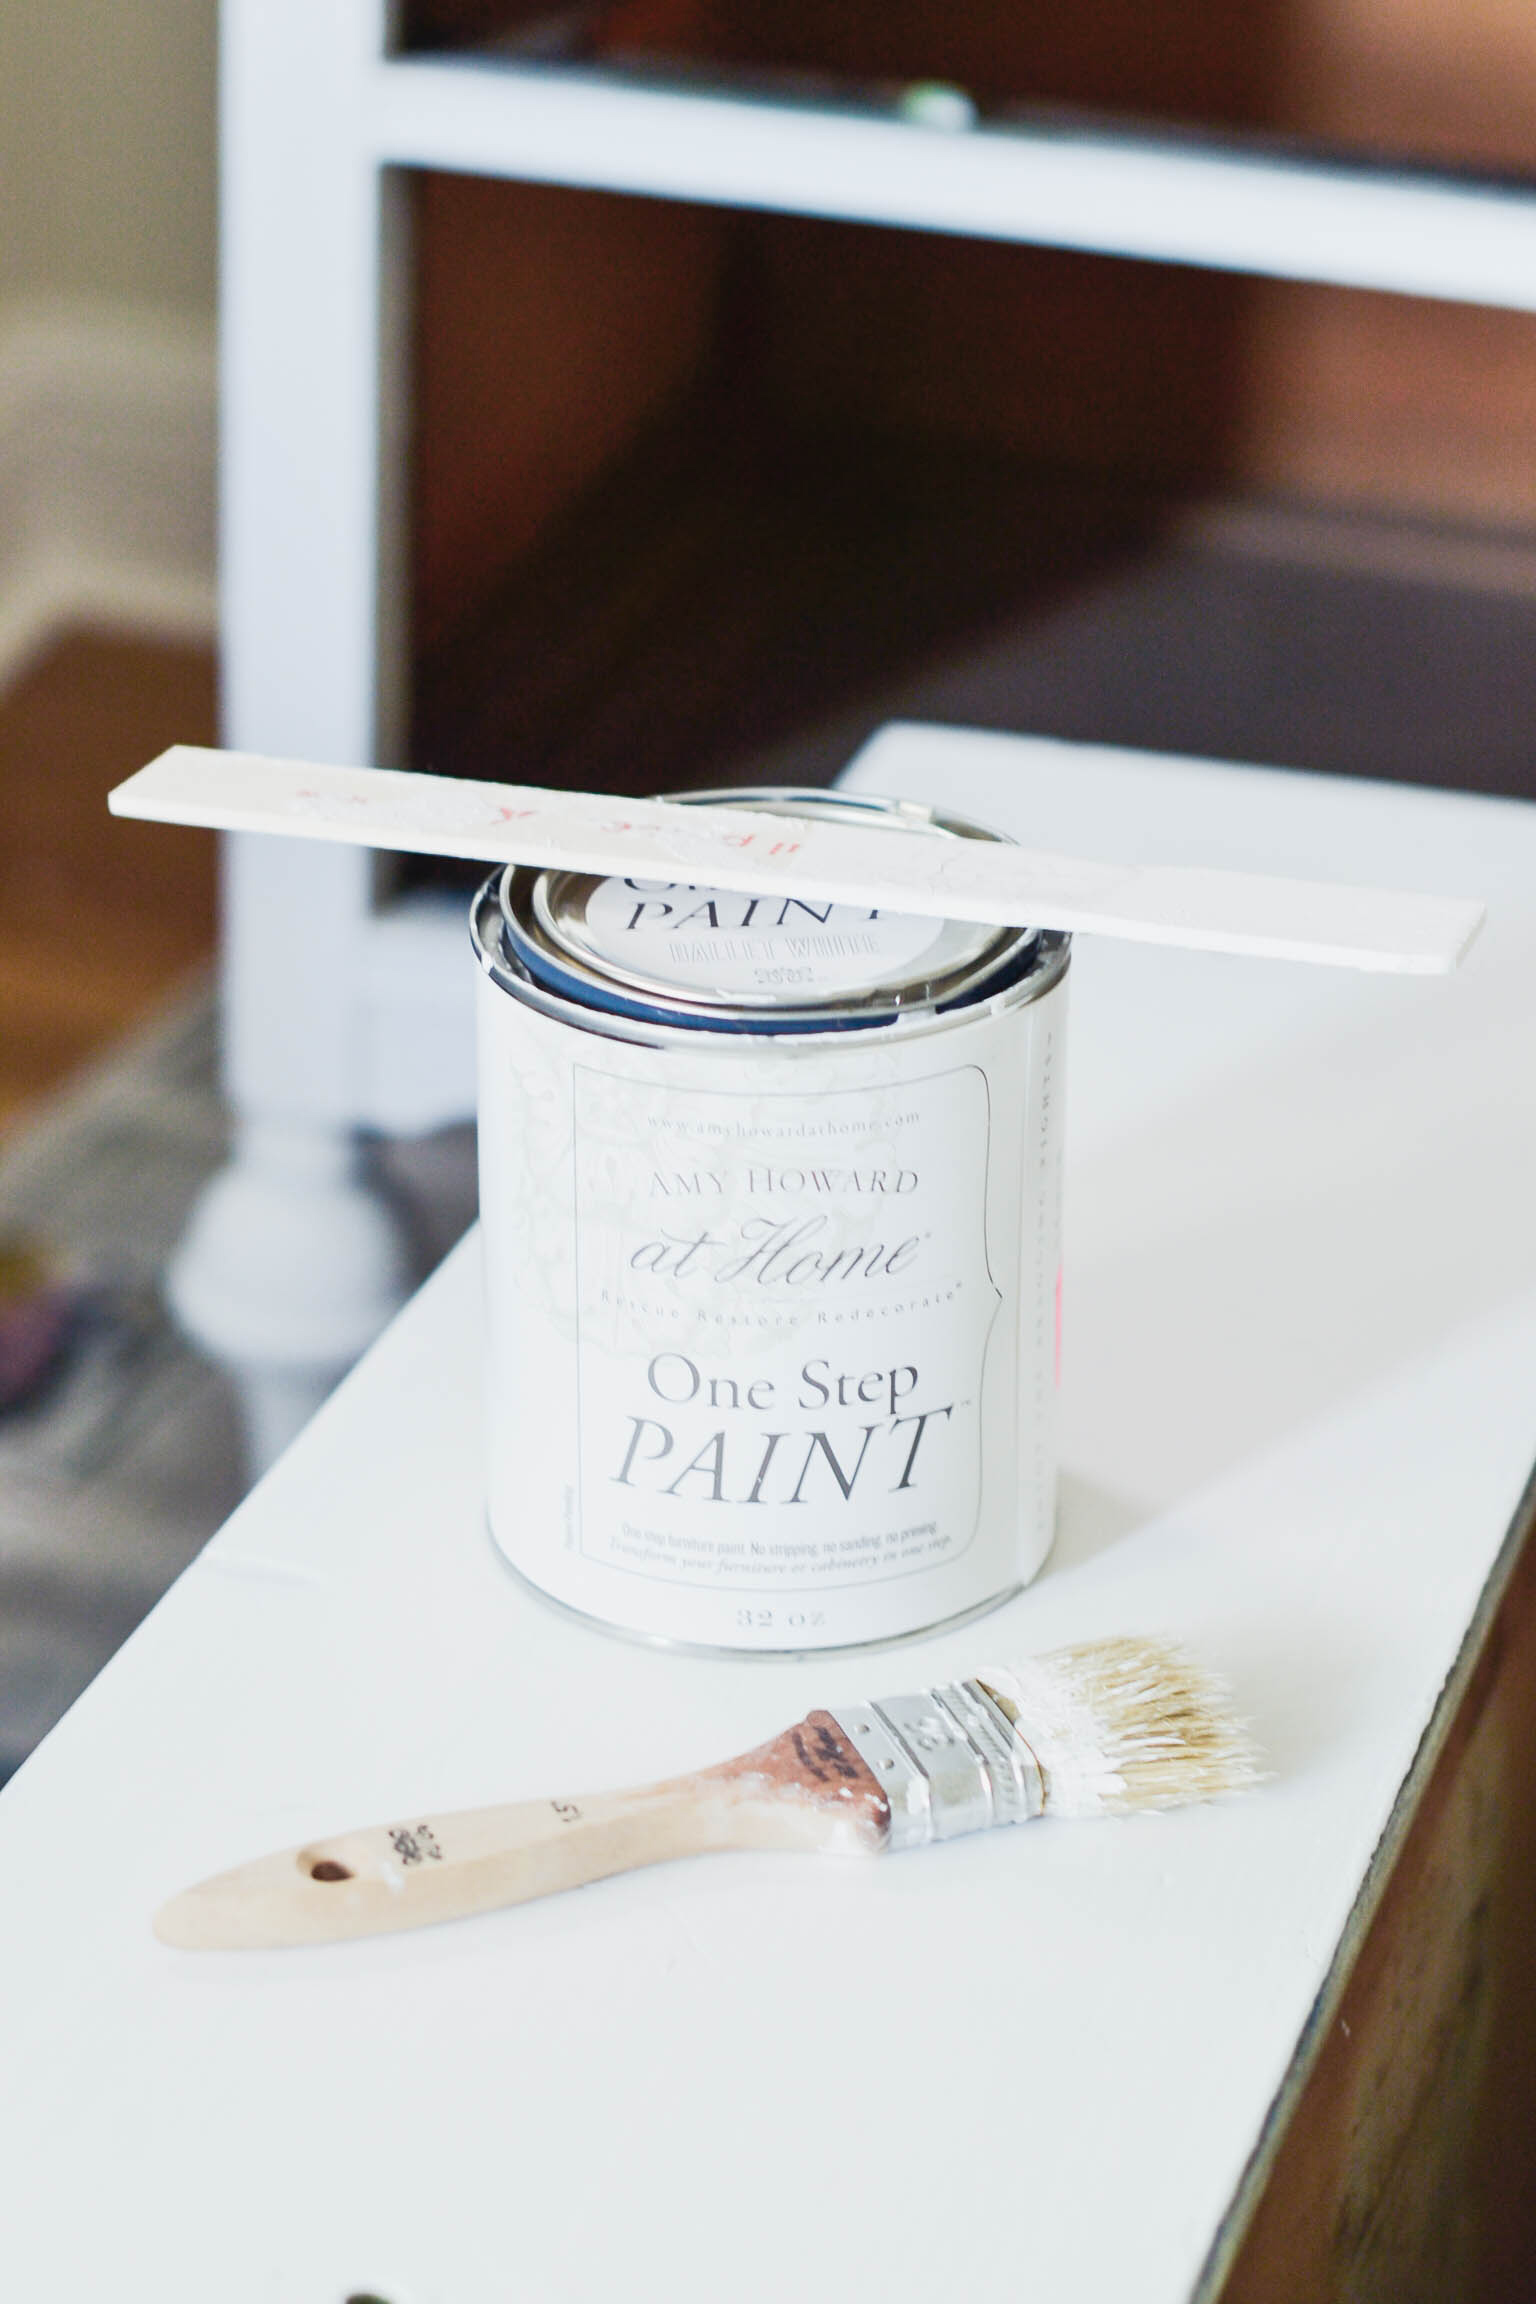
3. Paint with One Step Paint
This Amy Howard at Home One Step Paint is seriously amazing (I’m using Ballet White). I didn’t need to prime or even wait very long to do a second coat. Plus, it’s the perfect chalky white for creating that shabby chic look. Use a larger brush for the large, flat areas and make sure your paint strokes all go in the same direction. Use a smaller brush for the edges and carved details. You only need to wait like 15 minutes and then you can add a second coat.

4. Replace Hardware
Once the paint is fully dry (I’d wait a full 24 hours to be safe), put the drawers back in place and add some new knobs. The knobs really make all the difference! I got mine from Anthropologie here and here.
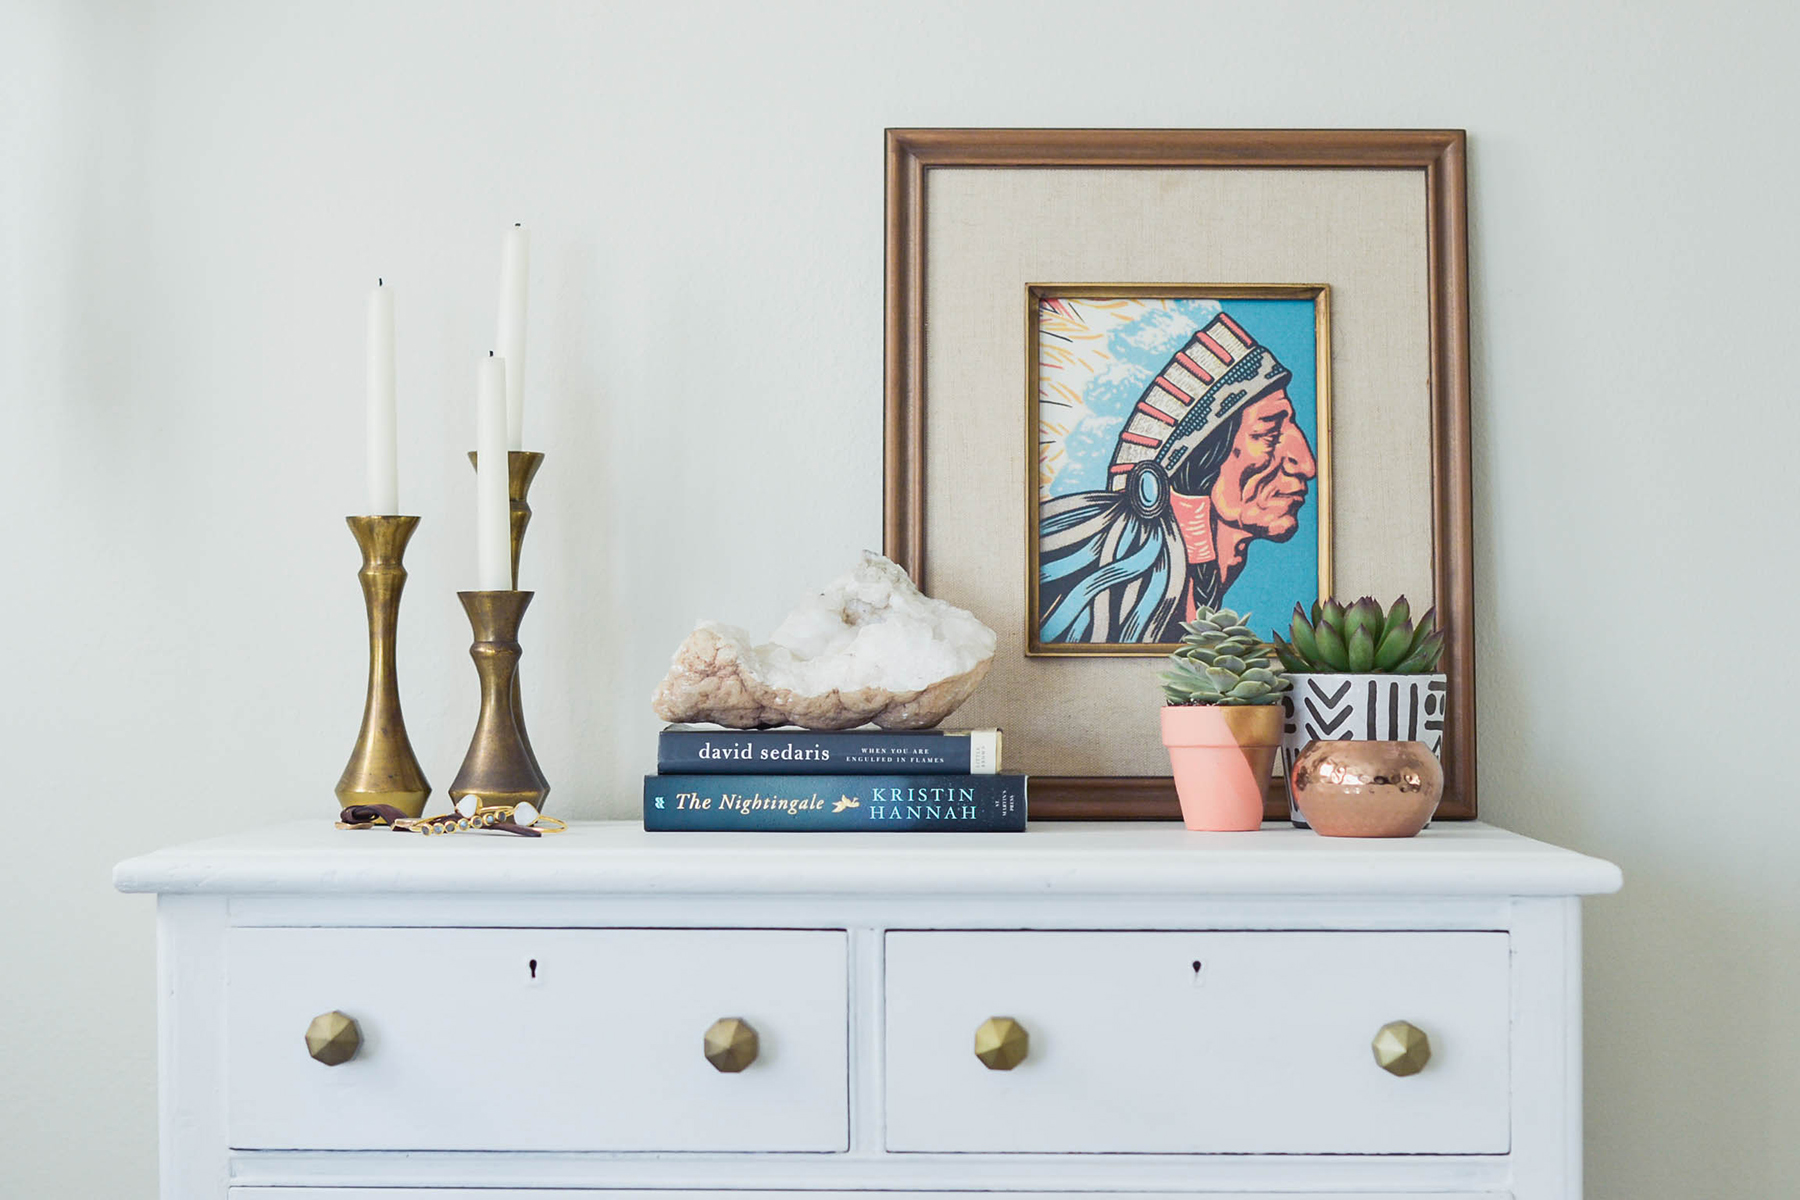
Check out the finished look!


Christa Says
So cute! Love the piece and your updates to it!
xo christa | http://www.gardeniasandmint.com
Pingback: Designing My Bohemian Bedroom with InteriorCrowd
Pingback: A Tour of My San Francisco Studio Apartment | Advice from a Twenty Something
Pingback: DIY Antique Console Makeover | Advice from a Twenty Something
Rosie Says
I really like how you were able to update this cute locker. These are the details that create comfort. You can always complement the interior with pleasant things that will make your place of power more attractive. I advise you to always study Walter E Smithe reviews before buying anything, so that there are no unpleasant surprises later.