 Using Trunk Club to Update My Spring/Summer Wardrobe
 5 Tips For Styling a Simple Summer Dress
 5 Ways to Style a Bandana
 3 Different Ways to Curl Your Hair
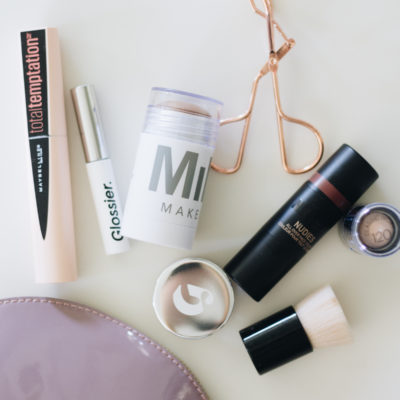 How to Master the 5-Minute Makeup Routine
 Amazon Beauty Buys Under $25
 3 Ways to Make Your next Trip More Memorable
 Tips for Digital Spring Cleaning and Organizing
 Color Trend: Marigold
 Mental Health Update: The 3 Major Changes I Made to Get Out of Depression
 5 Unexpected Ways to Unwind After Work
 How to Know You’re in a Controlling Relationship
 4 Questions I get Asked as a Professional Resume Writer
 How to Make Friends at Work
 Getting Out of the ‘Busy’ Mindset
 Ask Amanda: How do I pursue the career I want without formal training?
 Ask Amanda: How Do I Find a Therapist?
 Ask Amanda: How do I stop being jealous in my relationship?

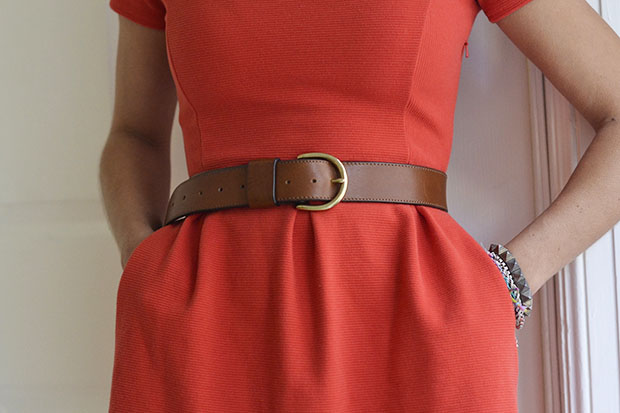
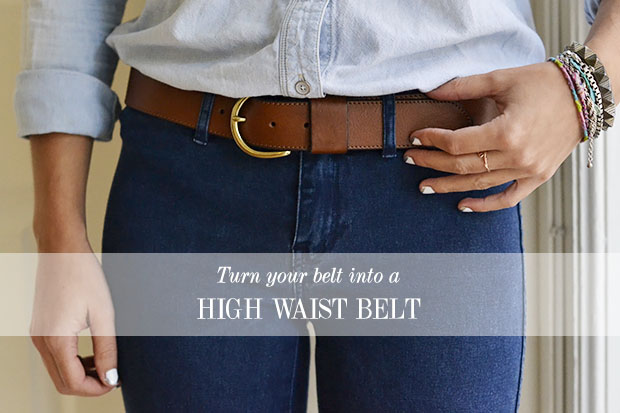
Do you ever come across one of your belts, think it’d be the perfect compliment to your high-waisted skirt, try it on and realize it doesn’t fit across your waist? The worst. I have this perfect brown leather belt from Madewell. It’s the right color, width, and I can’t stop wearing it with jeans and blouses. But when I wanted to pair it with a dress, I realized it didn’t have enough holes to secure it high enough up on my waist.
So instead of buying the same belt in two different sizes, all you have to do to make your belts more versatile is add holes. All you need is my secret weapon: a leather hole punch! You can find them for less than $10, and trust me, they’re worth it! You’ll use them not just on your belts but on your shoes, purses, anything you could add a hole to in order to tighten the fit. It’s pretty amazing. So here’s how to make a high waist belt:
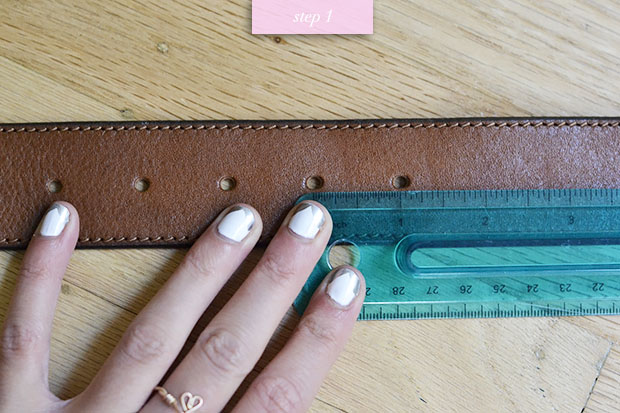
Step 1:
Start by measuring the distance between the belt holes. Measure from the middle of one hole to the middle of another.
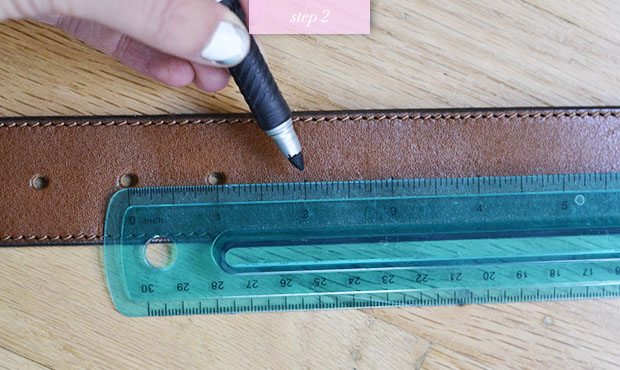
Step 2:
Use a marker or pen to mark where you’ll put your new holes. Keep them the same distance apart as the existing ones.
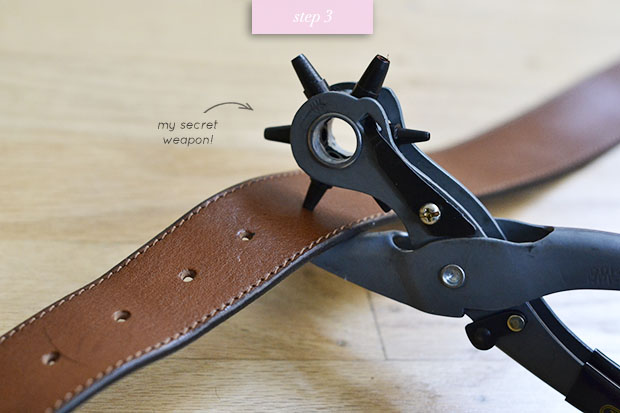
Step 3:
To figure out which size puncher to use, try each one in the existing holes. If it just fits without going all the way through, then that’s the right size. Now place the hole puncher over the dot you drew and use both hands to hold down the puncher really hard, until you hear a click.
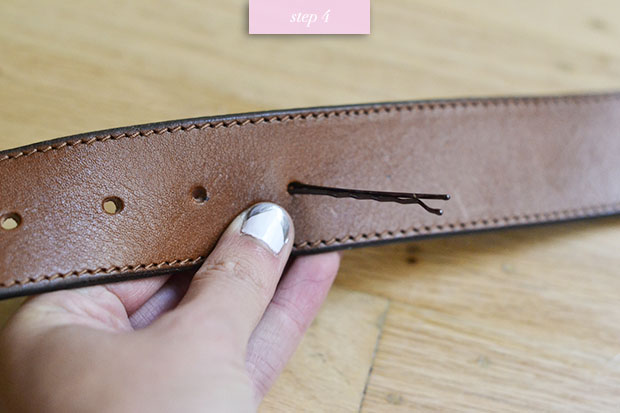
Step 4:
Sometimes the hole punch doesn’t quite create a clear cut, so use something like a bobby pin to push the excess leather through the hole.
And voilà! Two belts in one!


Psychophobia Says
Umm, isn’t this tutorial kind of … obvious?
Amanda Says
Post authorIt might be to some, but I thought it was worth showing my readers. Thanks for the comment.
Nani Says
Nice!!! Thanks for the tip.
Emily Says
My dad used to do this to my belts when I was a kid only he would simply use a hammer and a nail to punch the extra holes. This looks much safer though, especially for uncoordinated people like me.
-Emily
Allee Says
Oh God, I’ve done this before too except I didn’t have a leather punch and used a hammer and a nail. I also didn’t bother measuring so I have a series of holes for around my hips and then one that’s like 5 inches away for my waist. This way seems much safer!
sandra Says
Seriously you just save me time and money. Recently , my wonderful mother bought me a custom made leather belt from Ecuador , it sounds perfect right? Well there’s is one tiny problem the belt doesn’t enough holes! Thanks to you now I can do an extra hole & not buy a new belt. This is such a great tip!
Pingback: 5 Tips for Holiday Primping
Pingback: 5 Tips for Holiday Primping
leather belts Says
Great post! thank you so much for sharing this, i will surely try it out.