 Using Trunk Club to Update My Spring/Summer Wardrobe
 5 Tips For Styling a Simple Summer Dress
 5 Ways to Style a Bandana
 3 Different Ways to Curl Your Hair
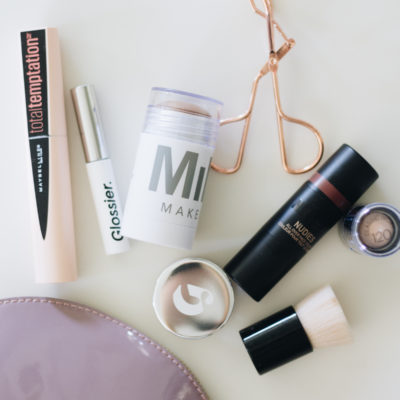 How to Master the 5-Minute Makeup Routine
 Amazon Beauty Buys Under $25
 3 Ways to Make Your next Trip More Memorable
 Tips for Digital Spring Cleaning and Organizing
 Color Trend: Marigold
 Mental Health Update: The 3 Major Changes I Made to Get Out of Depression
 5 Unexpected Ways to Unwind After Work
 How to Know You’re in a Controlling Relationship
 4 Questions I get Asked as a Professional Resume Writer
 How to Make Friends at Work
 Getting Out of the ‘Busy’ Mindset
 Ask Amanda: How do I pursue the career I want without formal training?
 Ask Amanda: How Do I Find a Therapist?
 Ask Amanda: How do I stop being jealous in my relationship?

The first business I ever started was an Etsy shop selling vintage high waisted denim shorts called Dirty Denims. After running it for two years, I made the difficult decision to sell it so I could put my focus towards my lifestyle blog, Desert Bloomed. I cut and hand-distressed every single pair in the shop and it was such a passion project for so long that I never stopped making shorts, even after selling the biz! I can’t wait to share all of the tips I’ve learned after years of selling vintage denim.
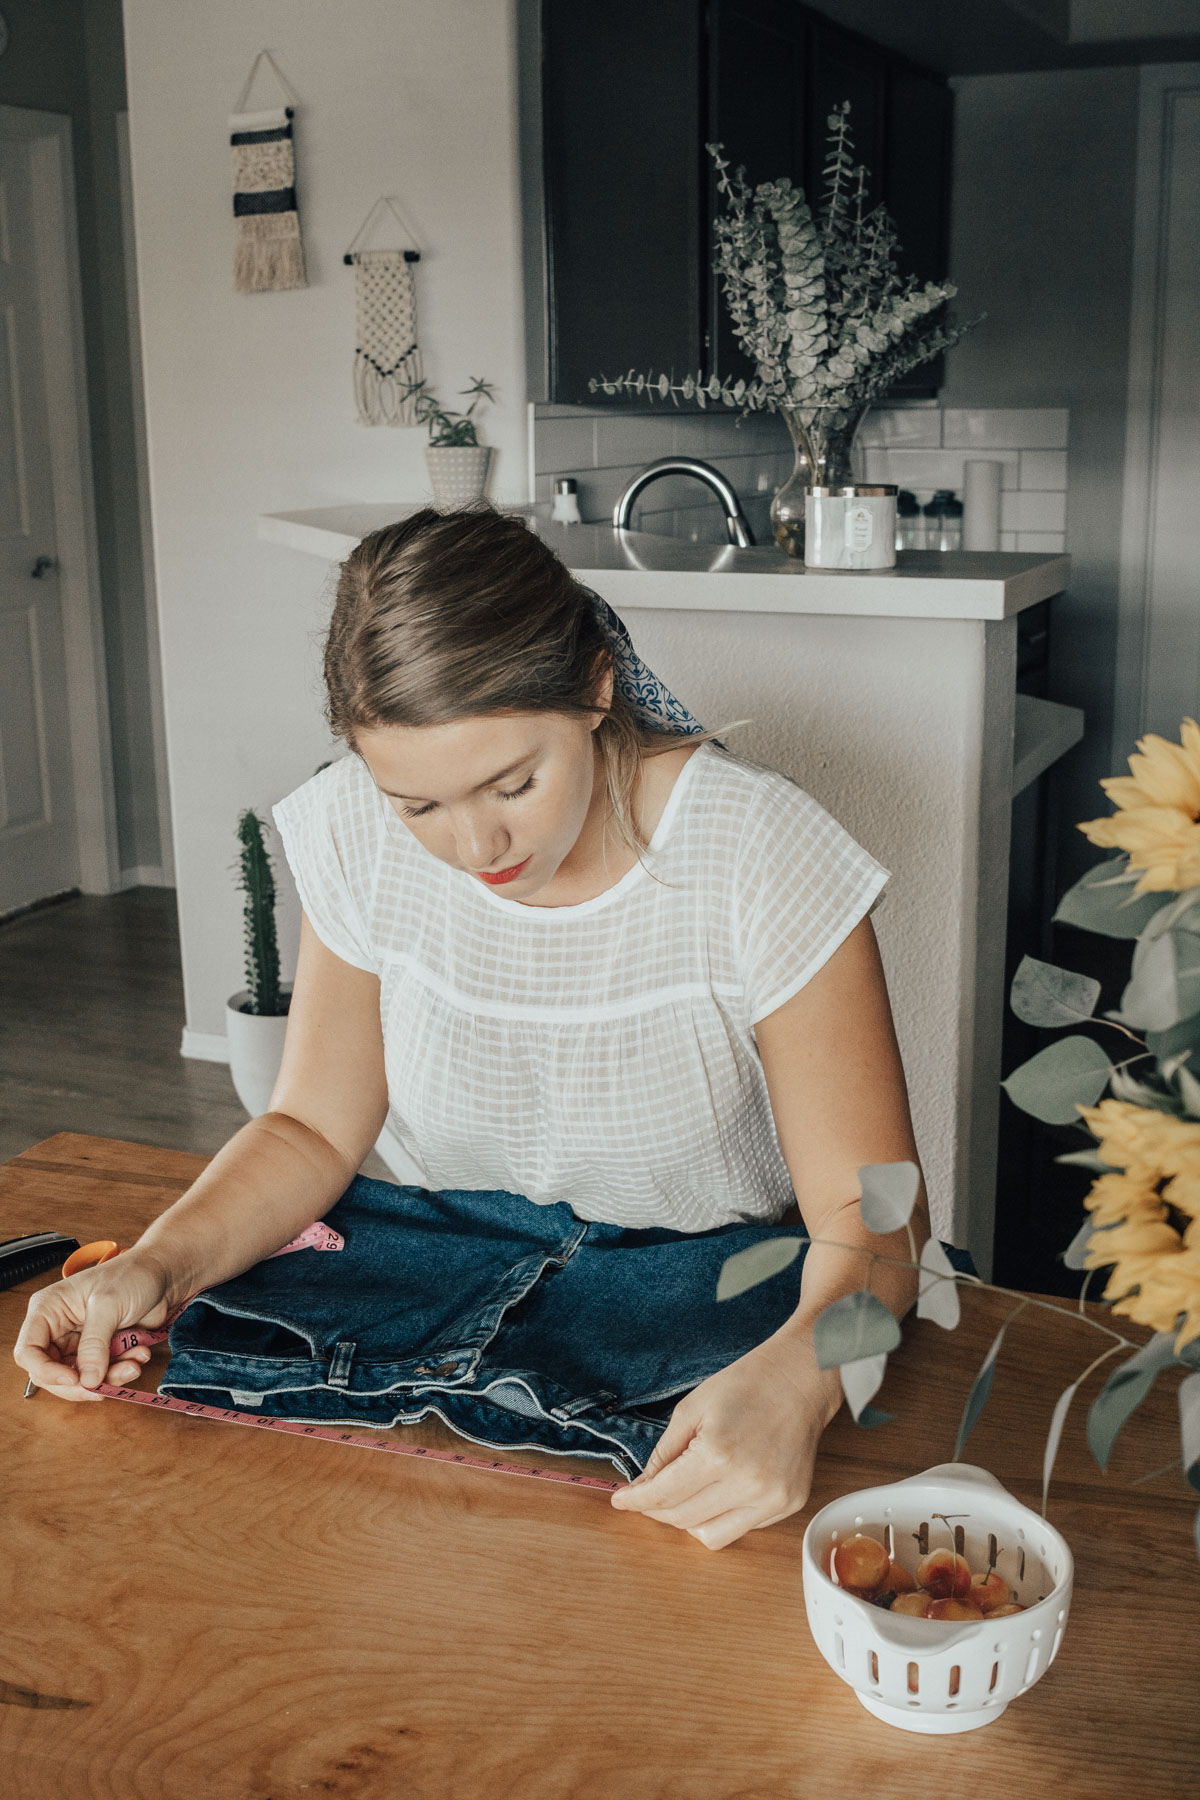
The Shopping Process
All of the high waisted shorts I’ve ever worn or sold have come from Savers, Goodwill, or other second-hand stores. I have a mental checklist that helps me quickly skim through the inventory and select on the best pair to be converted into cute shorts. You’ll definitely want to bring a tape measure because most of the time the size on the label is based on vintage sizing and is not comparable to modern sizes. During your search, make sure you’re looking for high-quality denim that is thick and doesn’t have any stretch to it. The denim of today’s jeggings does not distress well!
Tips
– Search for denim jeans or shorts that have a rise of at least 10″.
– Try to find Levis, Lees or Wranglers because those have always been the best quality denim.
– Stay away from color dyed denim – stick to white, black or blue.
– All that needs to fit is the waist, so don’t be afraid to try things on!
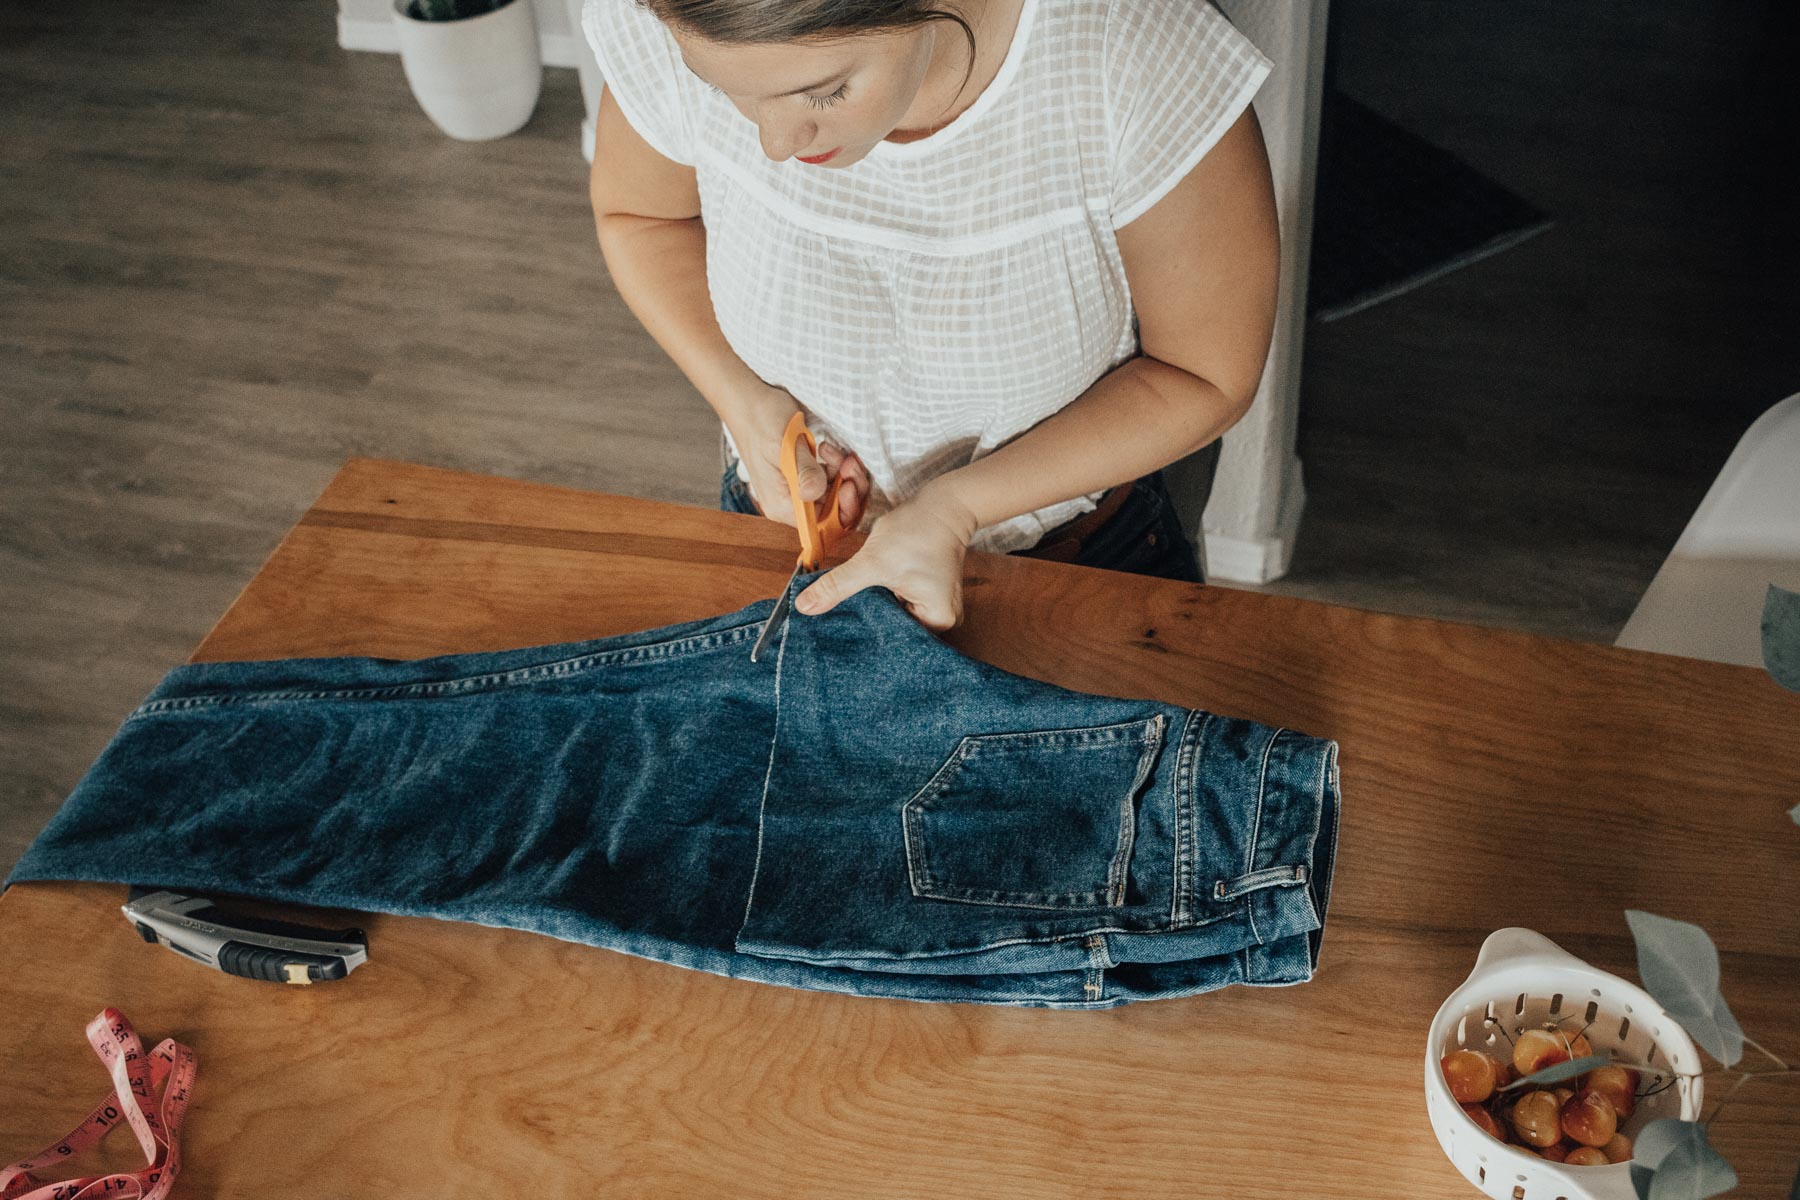
The Cutting Process
Step 1
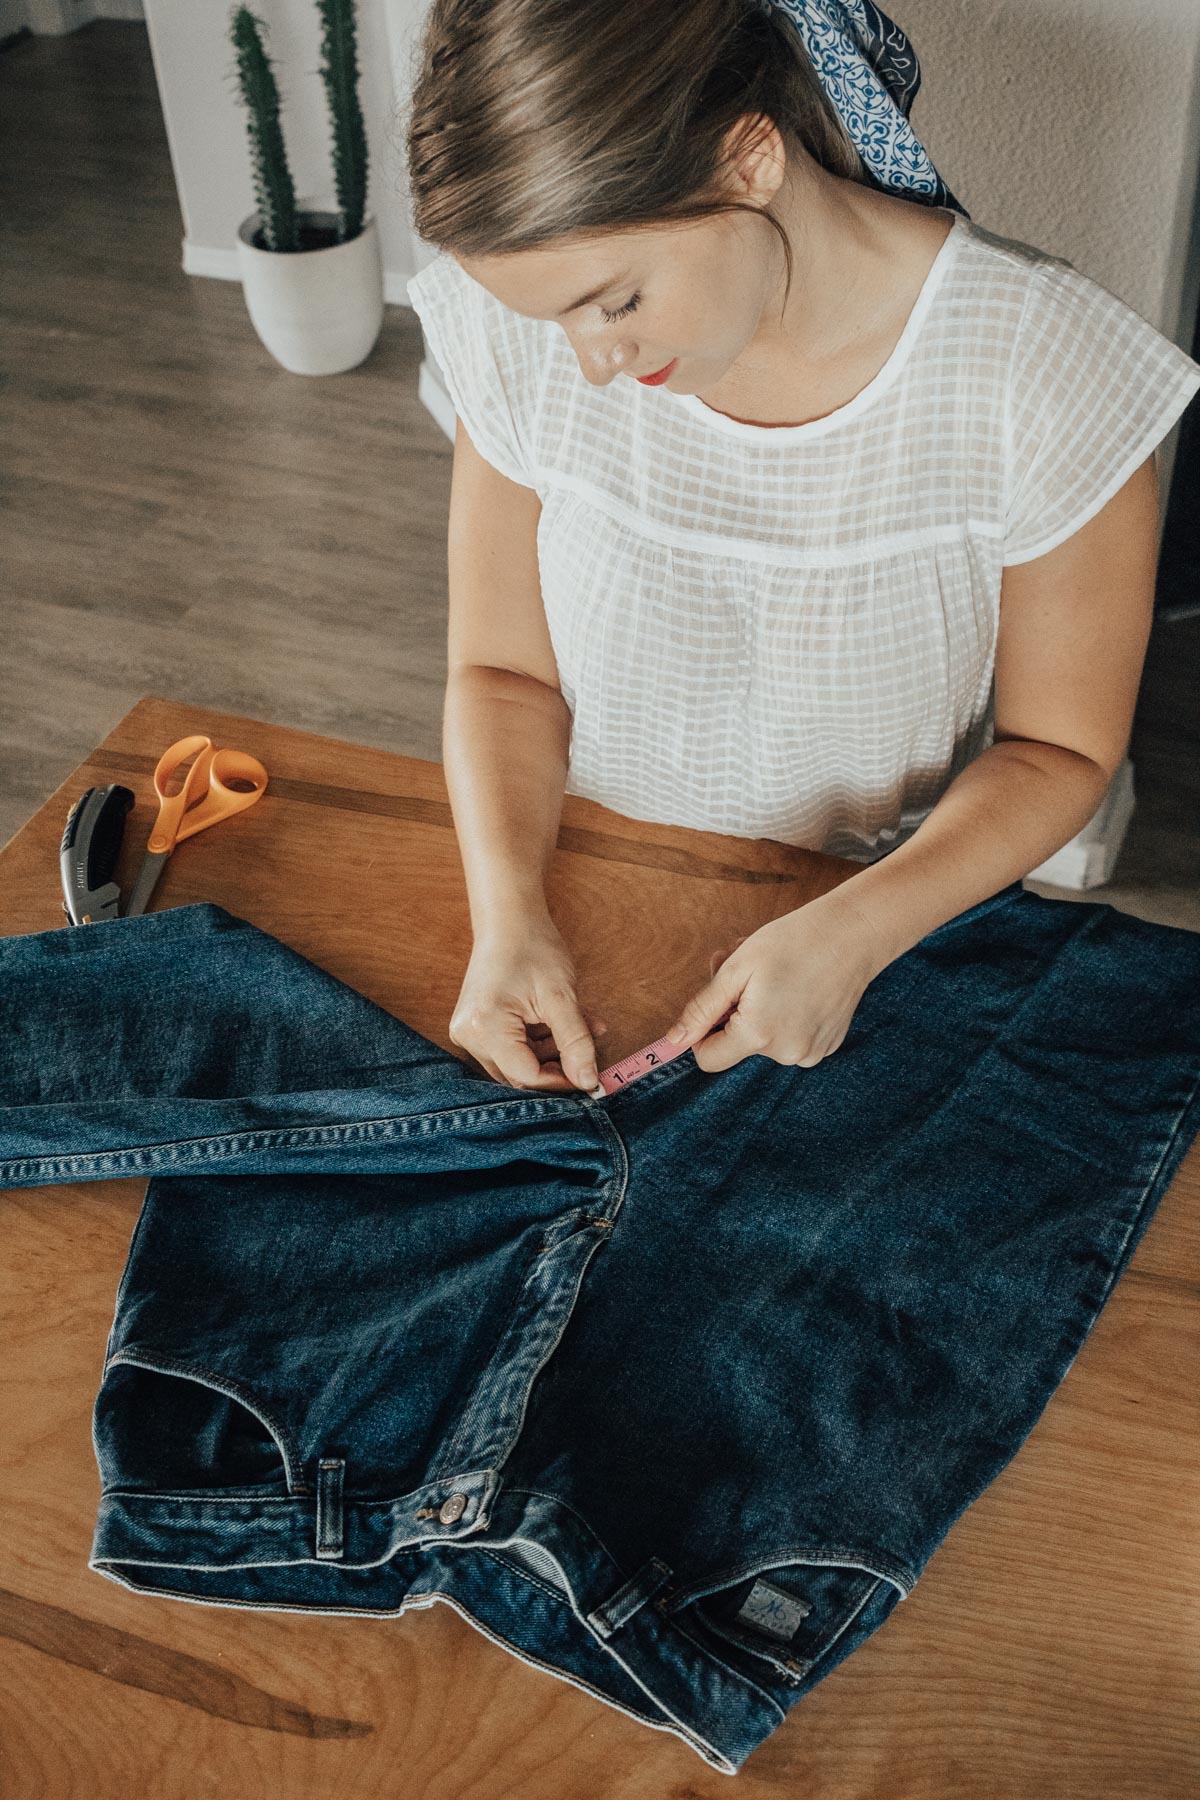
Lay your grandma jeans (or shorts!) on a flat surface and button them up. For extra booty coverage pull down the front just enough to see the tag so the back will be cut longer.
Step 2
Measure the inseam you want and make a small mark where you will start cutting. Proportionally, I recommend a 2″ inseam for anything smaller than a 29″ waist and a 3″ inseam for anything with a 30″ waist or above. I tether between a 29″ and a 30″ waist so I usually do 2.5″!

Step 3
At a slight diagonal angle, cut the shorts from the inseam to the outseam. Make sure to keep them really flat the whole time so the line is really straight. Fold the jeans in half and do the same to the other leg, matching up your first cut as much as possible.
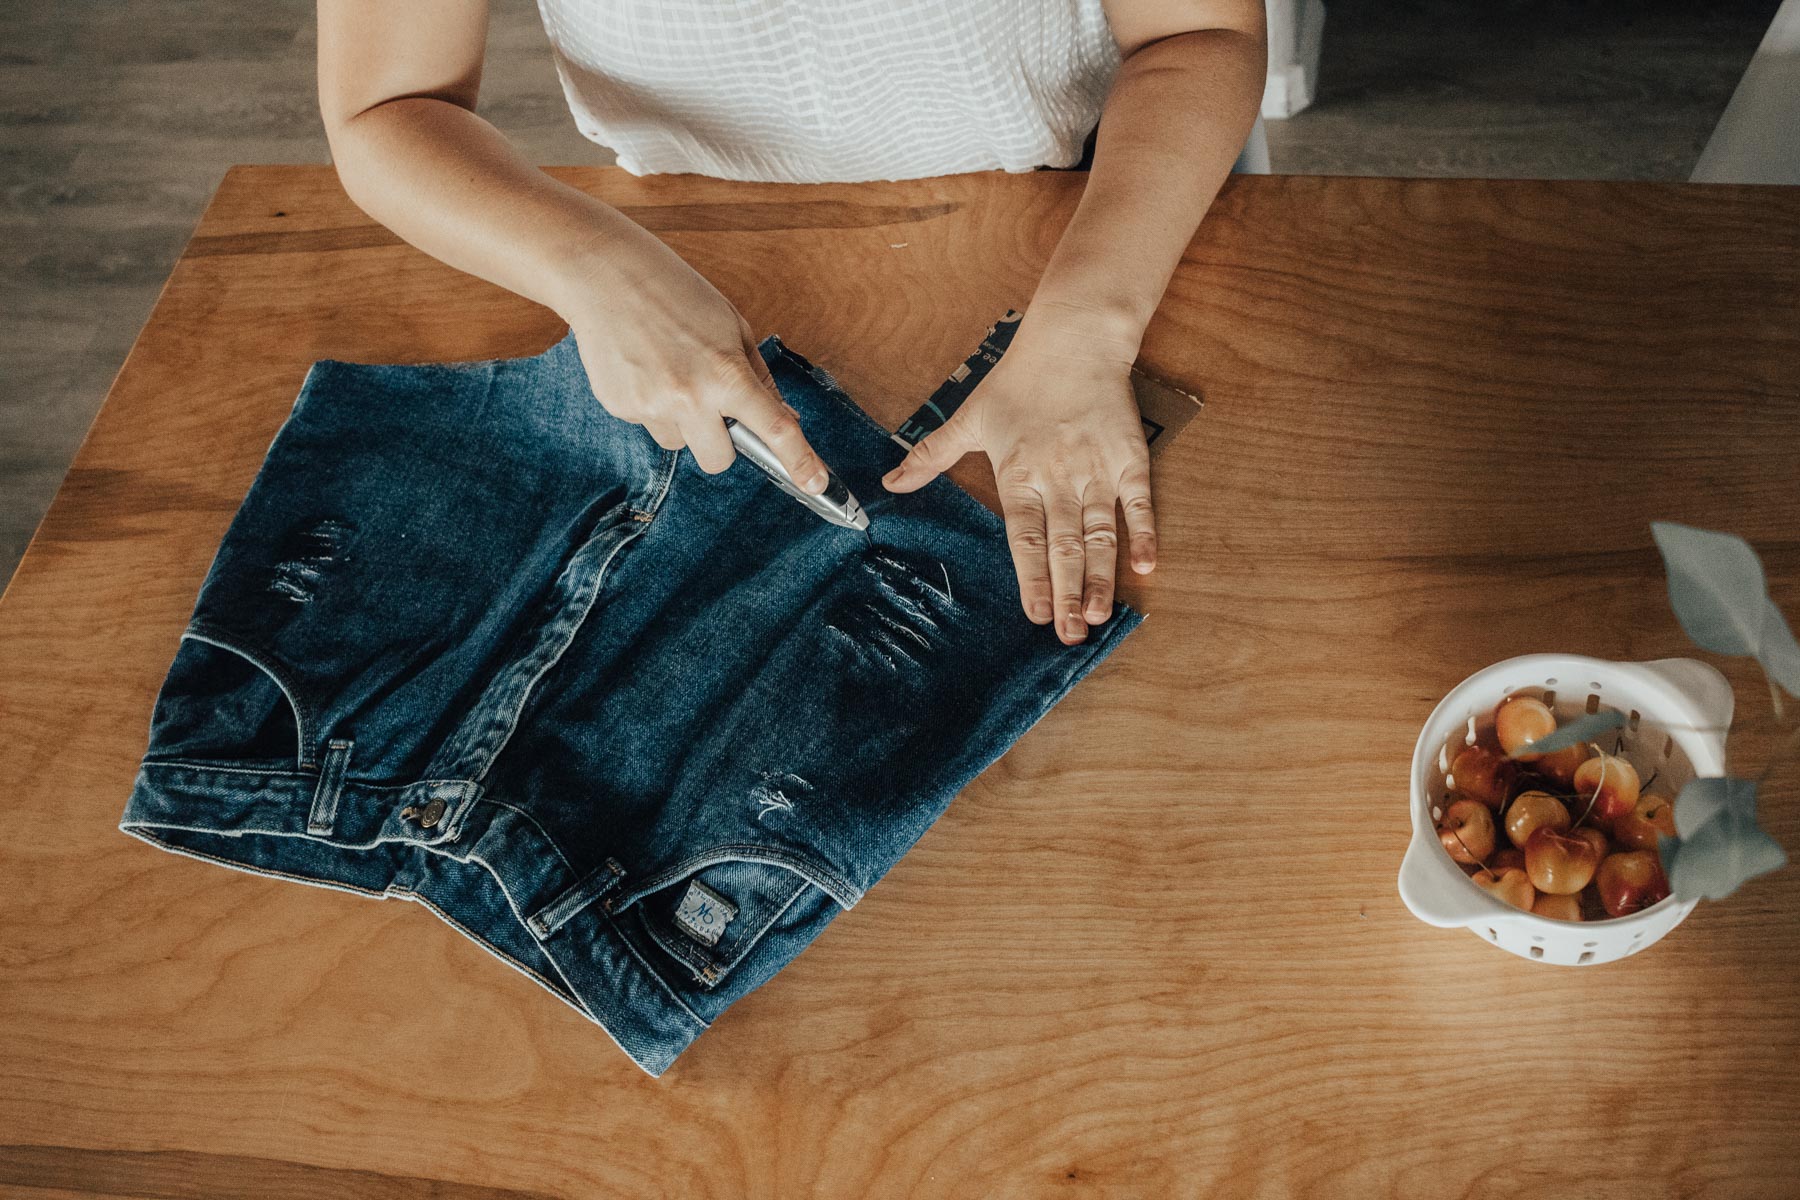
Step 4
To distress, all you need is a box cutter and a small piece of cardboard. Place the cardboard between the legs of the shorts so you don’t accidentally cut a hole straight through or slash a pocket (been there!). Make 2″ horizontal cuts on the spots where you want distressing but make sure to not go over the same spot too many times or it’ll end up being one big hole!
Step 5
Throw your shorts in the washer and dryer once you’ve finished all the cutting. This helps bring out the fraying and also washes out any nastiness (they are secondhand after all).
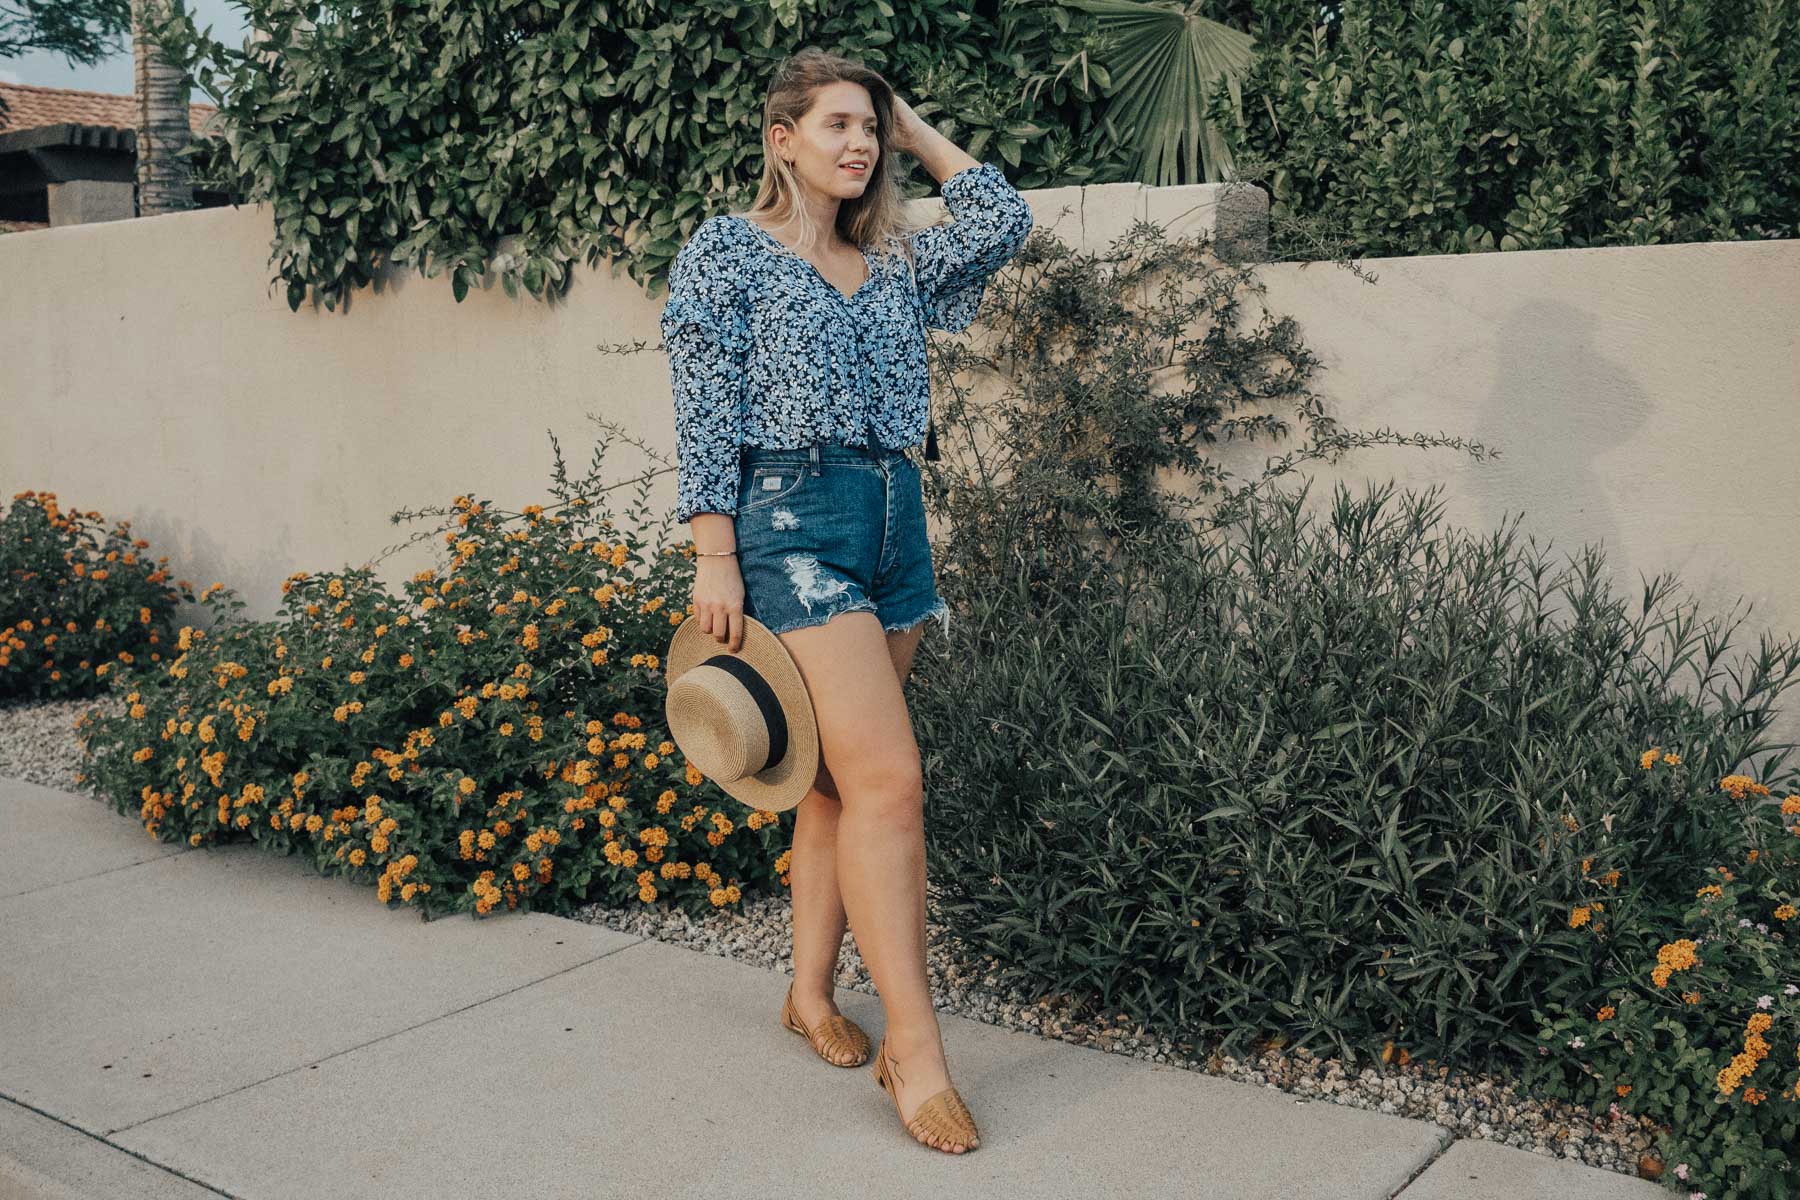
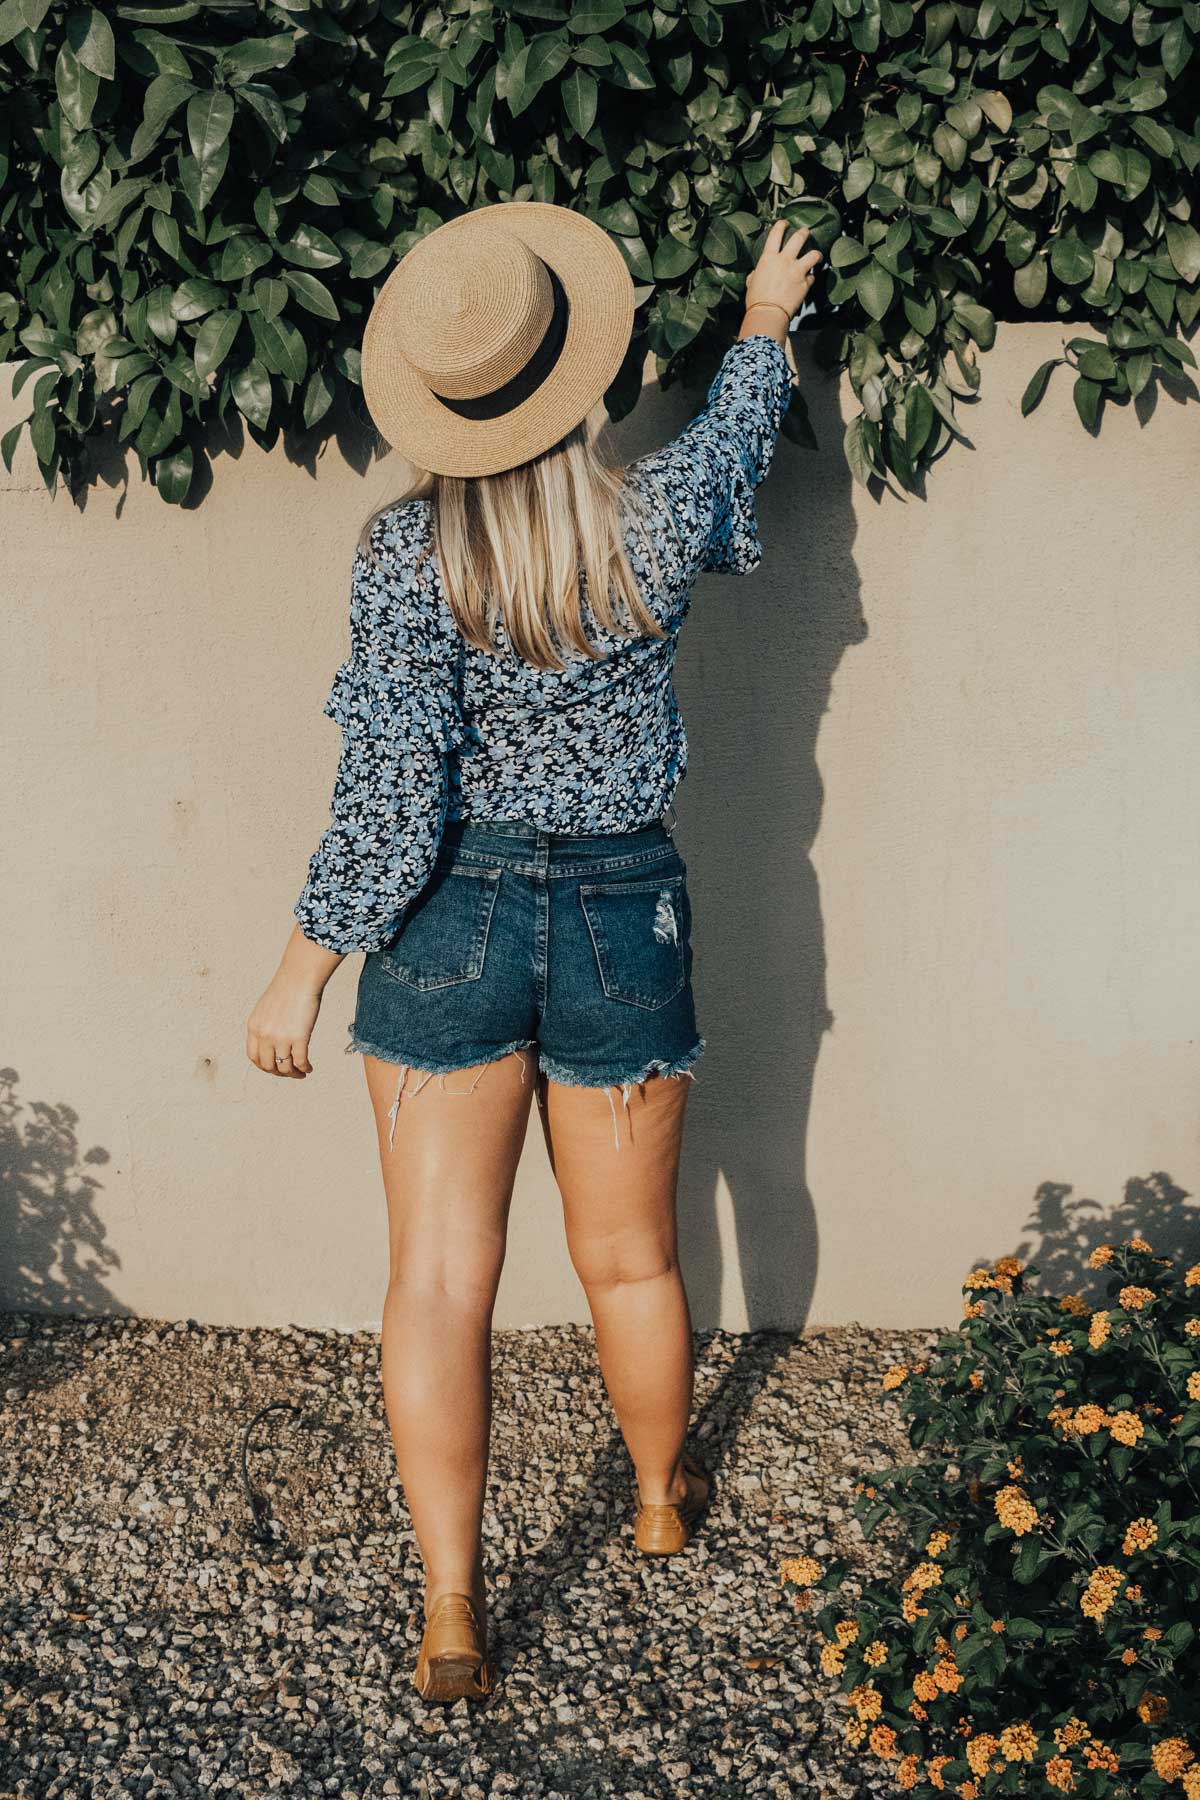
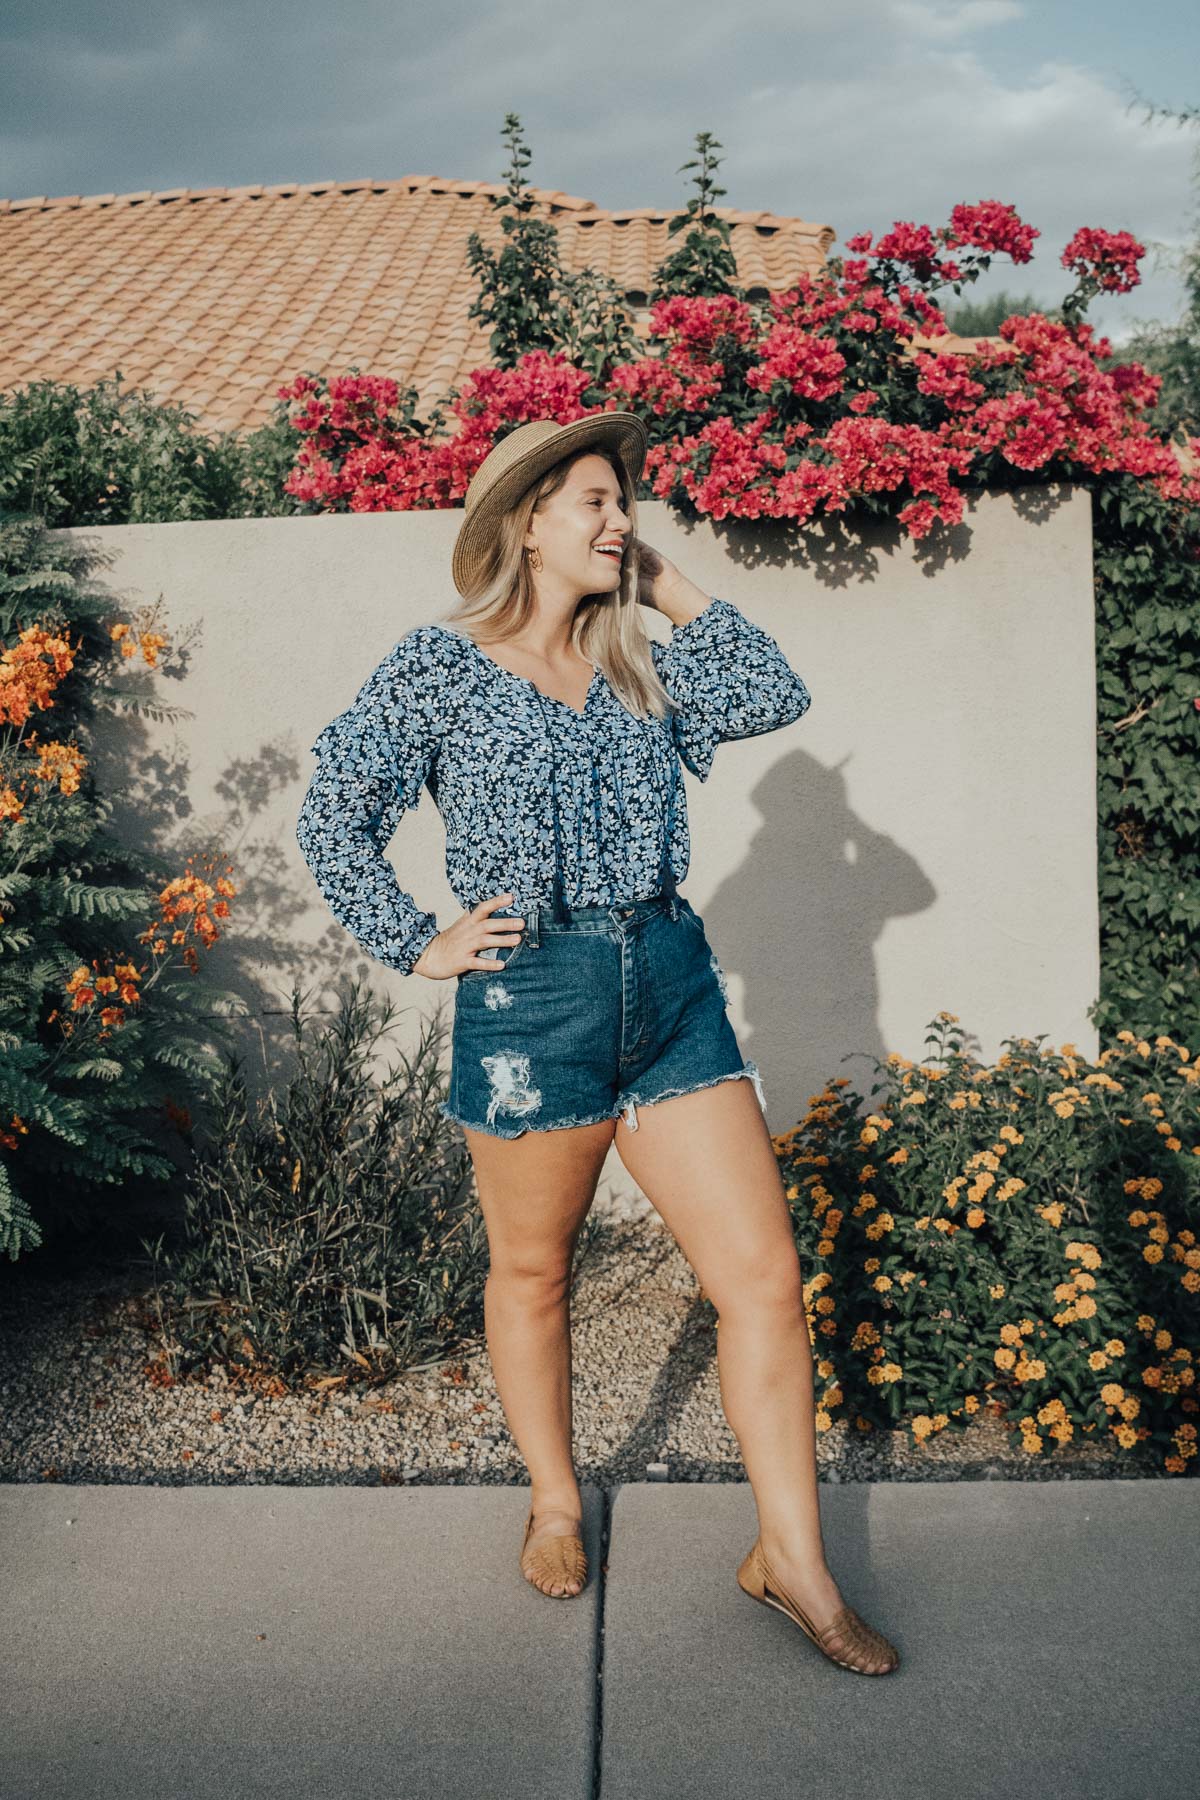
The Finished Product
After pulling your pair out of the dryer you should have perfectly distressed high waisted shorts that have about 1/2″ of fraying on the hem. If you want the hem to have a thicker fray, wash them again, but keep in mind they will distress a little more every time you wash them!
These are one of my favorite wardrobe staples because they’re so versatile. Wear them to the beach, to a concert, to the bars, to a sporting event, you name it. Especially living in Phoenix, I wear mine 9 months out of the year!
Let me know if you liked this high waisted shorts DIY and I promise to do more!
Megan Says
These are so cute! I’ve been looking for a good pair of high waisted shorts for… Probably two years now. I just can’t ever find what I’m looking for. This DIY solution sounds perfect, though – and I love that it’s going to be thrift-store prices. Thanks for sharing!
mywebsite Says
Please let me know if you’re looking for a author for your site.
You have some really good articles and I
believe I would be a good asset. If you ever want to take some of the load off, I’d absolutely love to write some material for your blog in exchange
for a link back to mine. Please blast me an e-mail if interested.
Cheers!
The Better Fit Says
This is so perfect. I have a few jeans that are just lying in my closet, it would be great to repurpose them as shorts.