The milkmaid braid literally fits my style perfectly. So when I couldn’t quite master it, I was seriously frustrated. Either my hair wasn’t quite long enough, the braids looked too thin, or the bobby pins were never in the right place. When my hair was a tad too short, I created a “faux” milkmaid braid, but that just didn’t have the same effect. So now that my hair has finally reached the right length, I’ve been doing some practicing. I’ve discovered a few secrets to mastering the milkmaid braid and of course I’m going to share them with you in this simple step-by-step tutorial
First, you need the right tools. Make sure your hair hasn’t recently been washed. You want texture so that it holds. If your hair is super silky and seems to fall out of a braid easily, apply some texturizing spray. Then make sure you have 6 bobby pins (similar to your hair color) and 2 clear elastics. Now follow these steps:
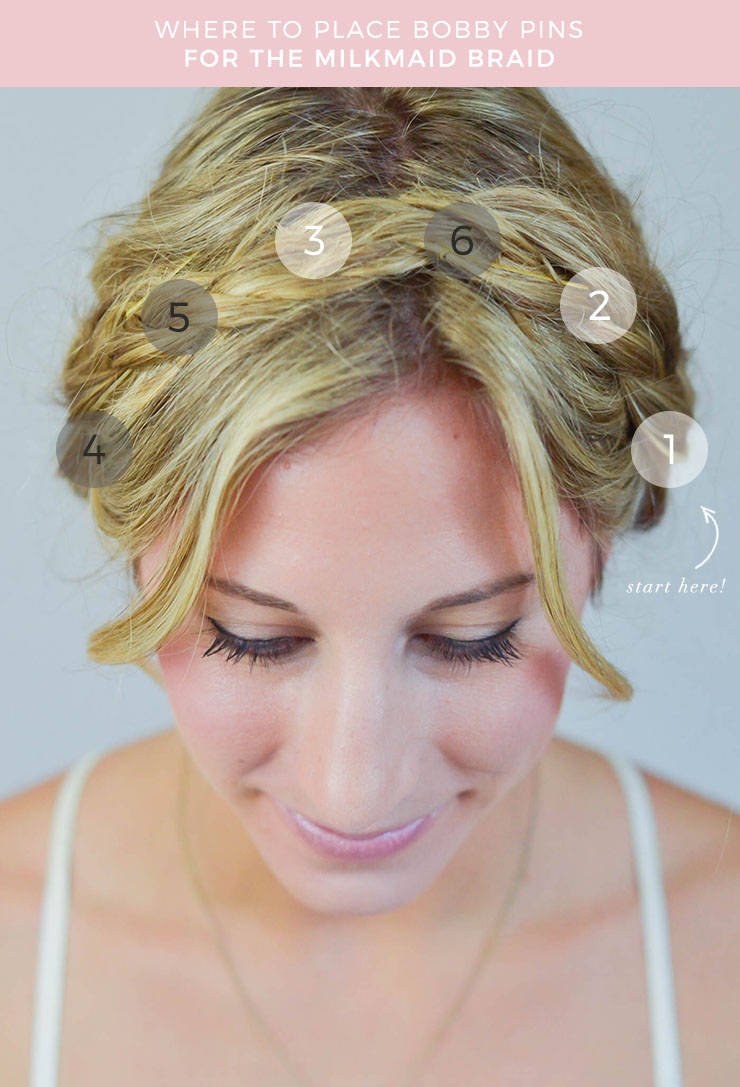
Was that easy enough to follow? If you still need help, don’t worry. I’ve created this little chart to show you where to place the bobby pins and in what order. Start at the base of the first braid. Loop the bobby pin in the middle of the braid (rather than around the entire thing), and slide the pin towards the back of your head. Then add a pin a few inches up, and a third at the end of the braid (on the other side of your head). As you repeat on the other side, make sure to tuck the ends of the braids underneath before you pin.
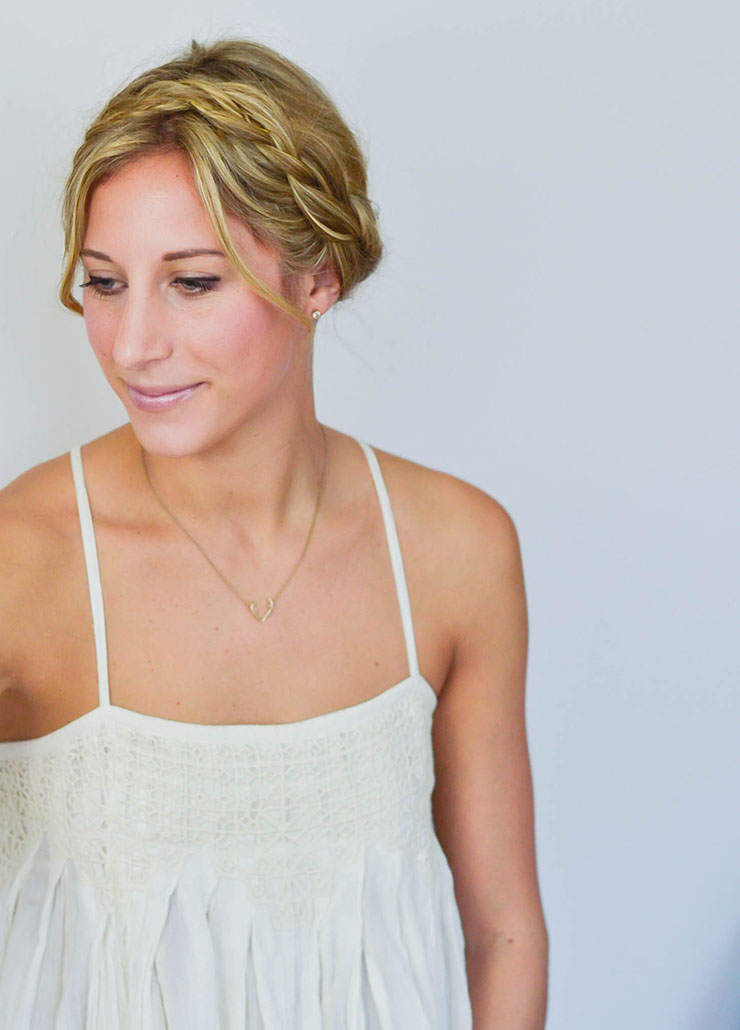
Here is the final result!
Let me know if you need more help by leaving a comment below!
 Using Trunk Club to Update My Spring/Summer Wardrobe
 5 Tips For Styling a Simple Summer Dress
 5 Ways to Style a Bandana
 3 Different Ways to Curl Your Hair
 How to Master the 5-Minute Makeup Routine
 Amazon Beauty Buys Under $25
 3 Ways to Make Your next Trip More Memorable
 Tips for Digital Spring Cleaning and Organizing
 Color Trend: Marigold
 Mental Health Update: The 3 Major Changes I Made to Get Out of Depression
 5 Unexpected Ways to Unwind After Work
 How to Know You’re in a Controlling Relationship
 4 Questions I get Asked as a Professional Resume Writer
 How to Make Friends at Work
 Getting Out of the ‘Busy’ Mindset
 Ask Amanda: How do I pursue the career I want without formal training?
 Ask Amanda: How Do I Find a Therapist?
 Ask Amanda: How do I stop being jealous in my relationship?





Vanessa Says
I love this hairstyle!! I will definitely attempt to do this soon. :)
Pingback: Top 10 Cute Braided Hairstyles for Long Hair
Matilda Knott Says
Really helpful thank you!
Grace Says
Really love this thank-you so much!!!
Pingback: Top 4 Bridesmaid Hairstyles to Make Your Friends Happy
Becky Says
This is the BEST tutorial! I never thought I’d be able to do a milkmaid braid and now I can! XO – Becky / http://www.roseandbrose.com
Pingback: 15 Coiffures géniales pour les paresseuses, faisables en seulement 10 minutes ! - Problemes de Filles
url Says
Pretty! This was a really wonderful post. Many thanks for supplying this information.